Overview
VMware Identity Manager aka vIDM (soon to be known as Workspace One Access) is a key piece of the vRealize Automation stack. Previous versions of vRA used an embedded build of vIDM within the vRA appliance and allowed the identity management capabilities to scale out as vRA itself scaled. With vRA 8 this is no longer the case with the identity management functions moved to their own appliance(s), in fact the same native vIDM appliances that you would use when deploying Workspace One.
In this article I am going show you the process of performing a scale-out operation for vIDM and cover the implications of doing so.
Lifecycling vIDM
As of version 8, everything to do with vRA deployment together with deployment and scaling of identity services it uses is conducted from vRSLCM (vRealize Suite Lifecycle Manager).
If you have deployed vRSLCM already (with or without vRA) then you will have a single vIDM appliance residing in your infrastructure (unless you opted to import an existing vIDM instance that was not using an external shared database).
Replacing vIDM SSL Certificate
Before you scale-out vIDM it is very likely that you will need to replace the SSL certificate that is currently in use. This is because the current certificate will be signed by the vRSLCM CA and only have a single entry in the Subject Alternative Names field. All the components in a vIDM cluster (including the load balanced service name you are going to use) need to be covered by the same SSL certificate therefore all hostnames need to be listed as SAN entries.
A new certificate can be provided by an external CA or one can be generated from vRSLCM. Here I am generating a new one using vRSLCM including short names and FQDN’s for all 3 appliances and the service name.


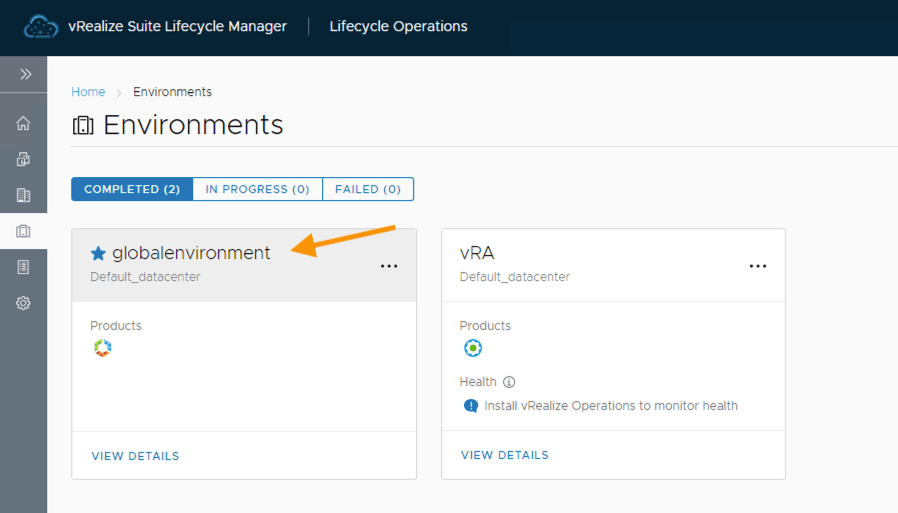
That vIDM instance being scaled will be contained within a vRSLCM environment called “globalenvironment” as shown below. This environment is created automatically by the Easy Installer process when vRSLCM is first deployed.
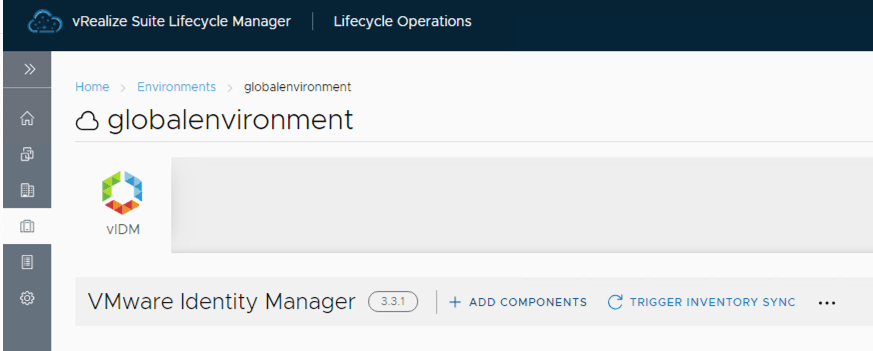
Entering the environment (3 dots or “view details”) opens up the current vIDM deployment config and provides a means to perform day 2 operations including:
- Adding components
- Replacing SSL certificate
- Taking Snapshots
- Patching
The first operation I am going to do is to replace the SSL certificate.


The operation pre-checks give a gentle reminder that if you replace the SSL certificate you will need to re-establish trust between vIDM and any products already deployed that connect to vIDM over SSL.
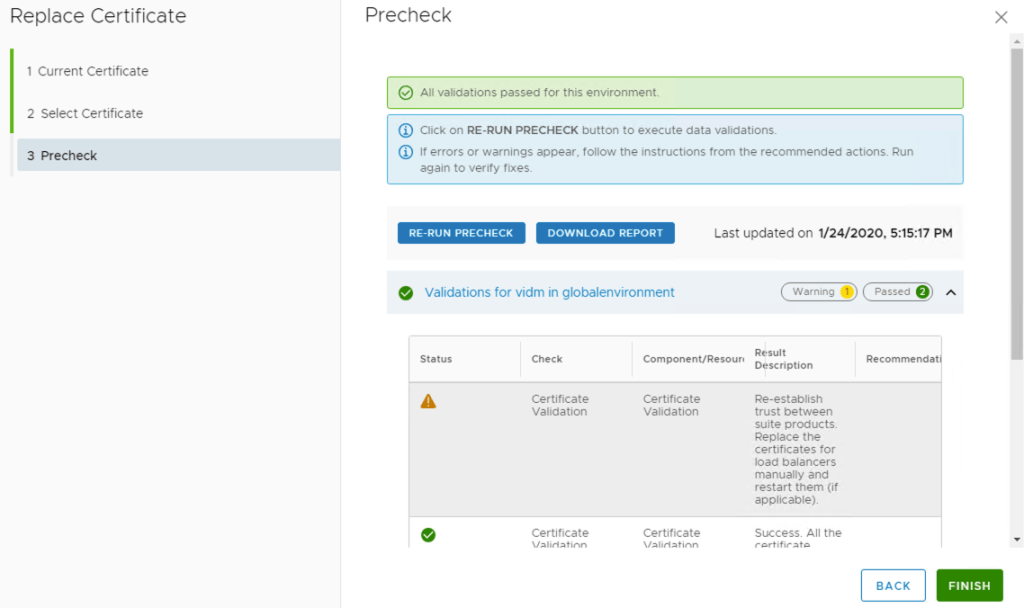
The replacement operation can be started as long as there are no other pre-check failures.

Scaling Out
Scaling out vIDM is basically adding more components so the “Add Components” option is used from with the “globalenvironment” environment.
Before any components can be added the infrastructure details for where the new components will be added needs to be specified.

The high level network information can then be provided which are applied to all new components. NTP and DNS servers that are already in the vRSLCM system can be re-called and used or new instances can be added and then selected for use.

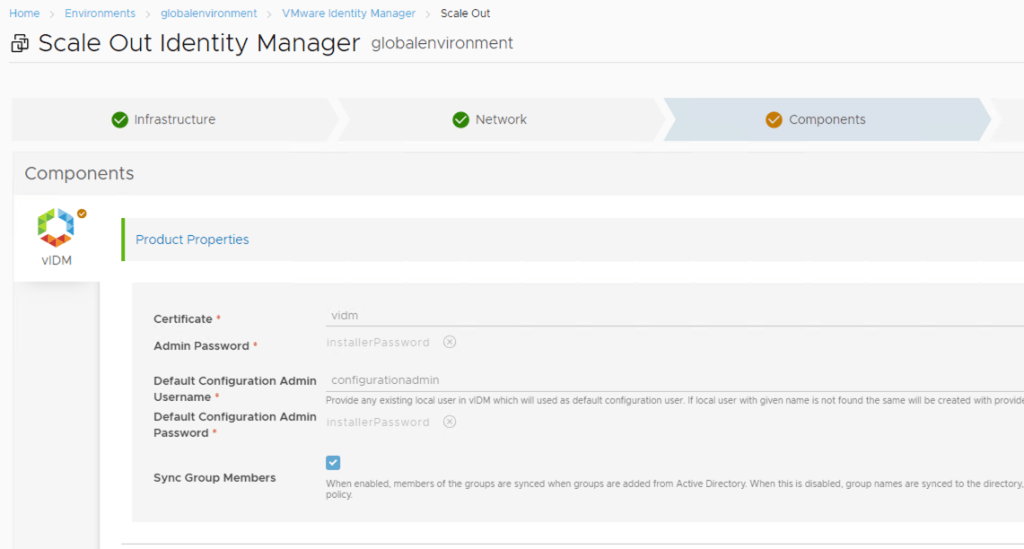
The properties information will now show the updated certificate being used. Nothing within this section requires changing so you can proceed down the screen.
Two new secondary components need to be added by clicking on the blue plus icon and selecting “Secondary”. Two components are required as a vIDM cluster can only have 3 nodes when used in the context of vRSLCM and vRA.
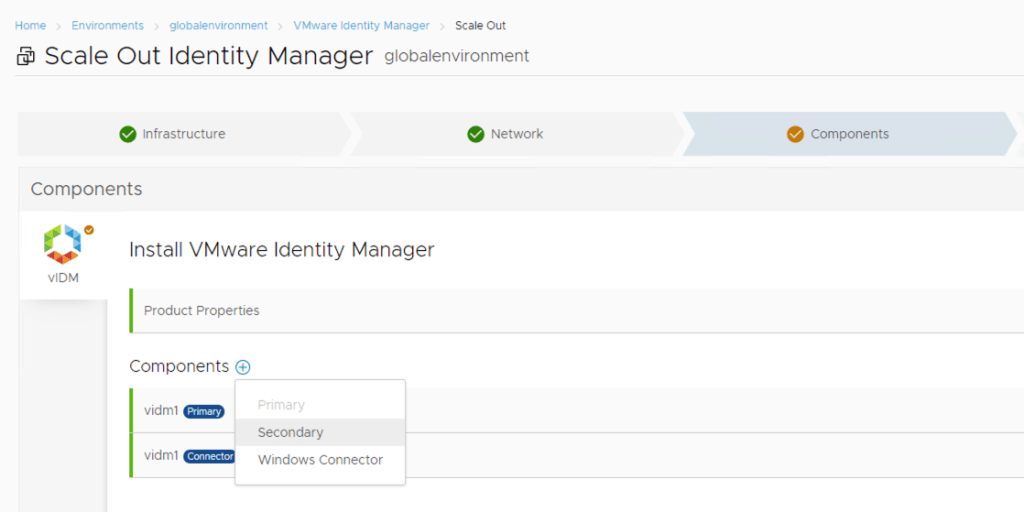
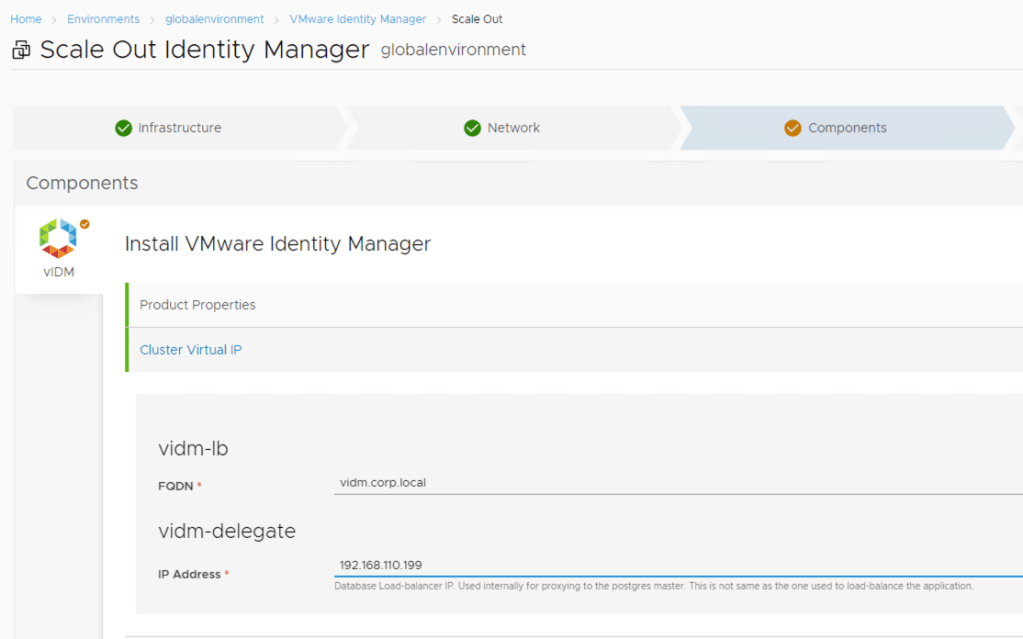
The addition of the 2 new components also adds a section for load balancing. A load balancer must already be deployed and configured prior to performing the scale-out otherwise pre-checks will fail preventing the scale-out from being performed. It can either be in one-arm or multi-arm configuration however SSL pass-through mode is required.
The Load Balancer high-level configuration is as follows:
Port: 443
SSL Mode: Pass-through
Health Monitor Port: 443
Health Monitor URL: /SAAS/API/1.0/REST/system/health/heartbeat
The configuration requires the FQDN of the service name as well as a valid free IP address on the same network that vIDM is attached to. This IP address will be used as a proxy address by the 3 appliances and therefore must be free.
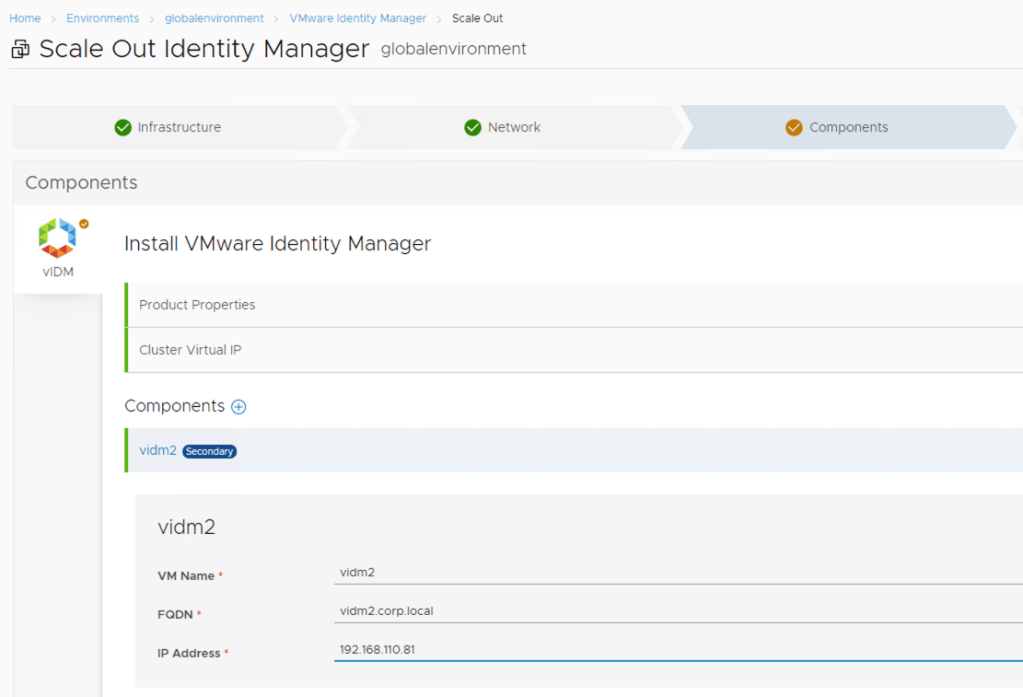
Each secondary section must then be completed, providing a FQDN, inventory name and IP address for each one.

Once the details have been completed the pre-checks can be initiated to validate the data provided.


The scale-out request can be submitted once all the pre-checks have passed successfully.


Verifying The Configuration
Once the scale-out operation has completed you should be able to log into the load balanced service name of your vIDM deployment. Once there you should load the “Administration Console” as shown below.

The “Identity & Access Management” section should display 3 separate connectors , one per vIDM appliance. For those of you who used to use vRA 7.x in a clustered deployment this will look some what similar except that the connectors are embedded in the vIDM appliances rather than the vRA appliances.

If everything looks OK here then you should be good to go. Of course it’s always a good idea to verify full functionality by systematically removing pairs of vIDM nodes from the load balancer pool to ensure the remaining node is functional. Don’t forget to put everything back once you are done!

Pingback: Identity Management – Scale Out via vRSLCM — vnuggets – Ideas are One thing but Action is the Key