Overview
In this article I’m going to start delving into Salt states so you can start to see how SaltStack Config goes about applying configurations to workloads (i.e. Minions). I’m just going to be looking at some of the basics here so we’ll save things like requisite states, template filtering etc for a future article.
States are something that Salt applies to a Minion and they are referred to in the past tense. They don’t reflect what you want Salt to do, rather what you want the end state of a target (one or more Minions) to look like. For example, when using States you wouldn’t ask Salt to install a package, you would tell Salt that the package concerned should be in a installed state for the target specified. This should not be confused with remotely executing individual execution module functions on a Minion which works the other way round but we’ll cover those in another article.
What Is A State?
A State is just that, a state you want a target to be in. They are defined in one or more SLS files and each file can have multiple States within it. The file itself can either be named with a restricted filename (init.sls) or anything else (e.g. anything.sls). The importance of this difference will be come apparent shortly.
A State file (by default) is constructed in YAML format with each state using state modules to articulate what the state should cover. For example if you wanted to install an application you might use the “pkg” State module with one of that modules functions (e.g. pkg.installed). That function would then require other information to work such as the application name you are installing, the version number and maybe whether you want to allow updates.
Here’s a very basic example for installing haproxy.
InstallHAProxy:      #State ID
  pkg.installed:     #Module & funct.
    - name: haproxy  #App name
    - version: '1.2' #App version
Of course there are a lot more options available such as specifying groups of packages etc and each state module and function has different options. Check out the following link for a full list of Salt State modules and their options (https://docs.saltproject.io/en/latest/ref/states/all/index.html).
The File System
State files are held on one or more file servers which could be on the SSC appliance itself (or individual Master server file systems if you are leveraging Enterprise) or in some other distributed content store like GIT which is made available to the Master.
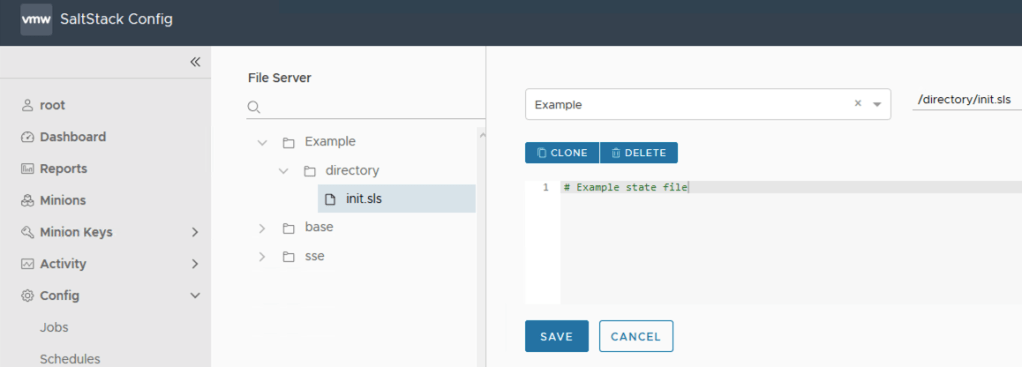
SaltStack Config and Enterprise comes with its own file server which is essentially GUI access to a back-end PostgreSQL database. No matter whether you use this, local directories on a Master or something like GIT the basic premise is the same. The file system contains user defined directories with the root directories classified as environments and sub-directories in each environment used to store state files.
The following is a basic example using the in-built file server in SaltStack Config which has 3 environments defined (Example, base and sse). Within the Example environment there is one directory and one state file within that.
What About Applying A State?
Once you have a state file defined you can either apply the state as a one-off command execution against a target or you can define a job which contains the reference to the state file which can then be used over and over again or even scheduled.
Here you can see I am defining a new job with an undefined target (allows flexibility for selecting the target at run time) using the “state.apply” function. There are many other functions (too many to go into here) but in the context of this article we might equally use the “state.disable” function to make sure this job never runs on a target.
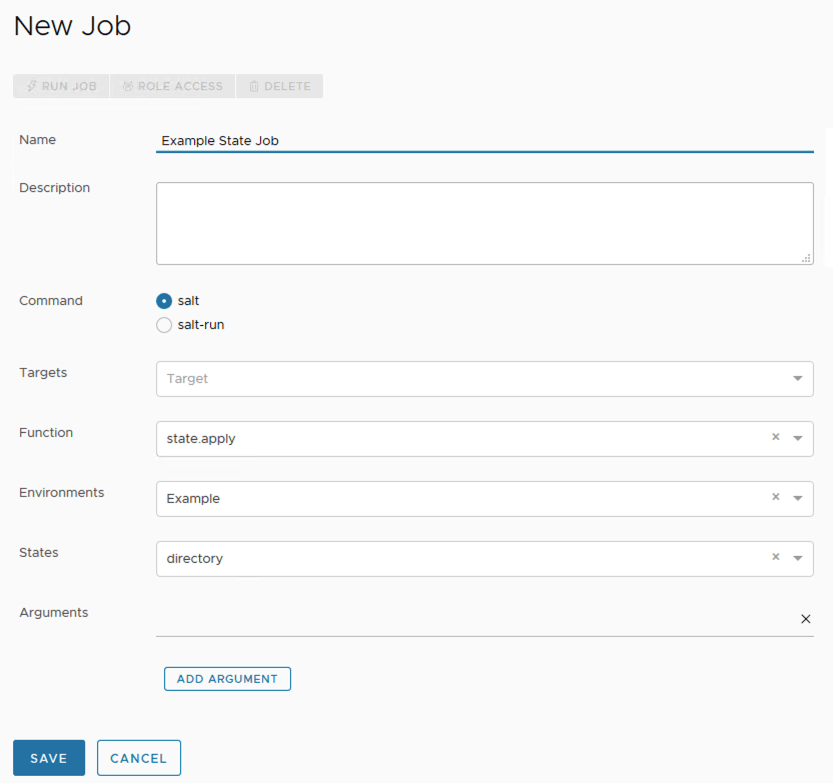
The environment selection combined with the state drop down then allows the state to be selected. The state name is either the directory that a init.sls state file resides in OR the directory and state file separated with a period symbol if the state file is called something other than init.sls.
Here you can see how my modified file structure (with another level of directories and some different state files) is represented in the states drop down list.

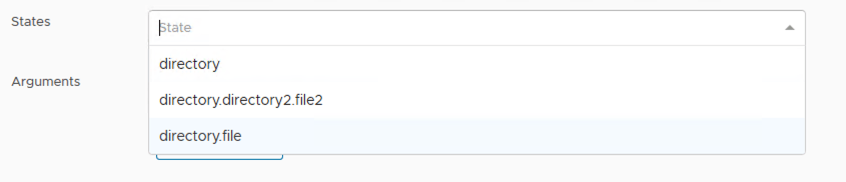
- directory = Example/directory/init.sls
- directory.directory2.file2 = Example/directory/directory/file2.sls
- directory.file = Example/directory/file.sls
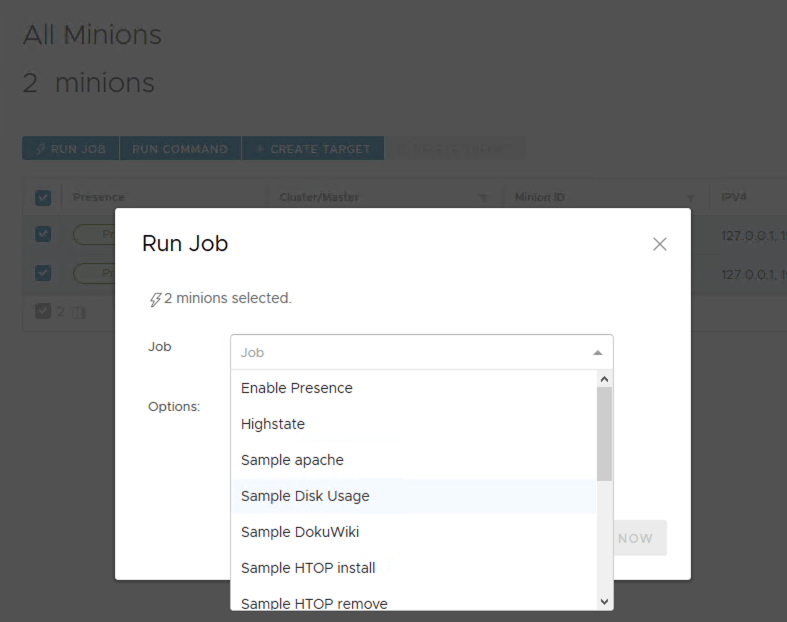
Once the job is defined it can then either be run directly from the Job screen after choosing a target or by selecting the target Minions from the Minions menu and then choosing the Job to run.
There is also the command line option as well. In this example my targets are within the quote marks (I’m specifying all Minions here), then my function, then the environment and finally the name of my state directory (as my sls file is called init.sls).

There are more things beyond simple state files such as templating, top files, beacons, reactors and many more but we’ll get to those in future articles.
