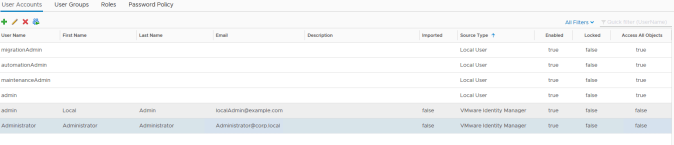
Out of the box, vROPs 6.7 comes with a set of local admin accounts designed to be used for initial product setup and cluster management/maintenance.

These accounts should not be used on a daily basis (it’s just bad practice and has no audit trail), therefore one of the first things that should be done POST installation is to define the authentication mechanism that will be used.
Using the “Authentication Sources” option we can add new type of authentication.
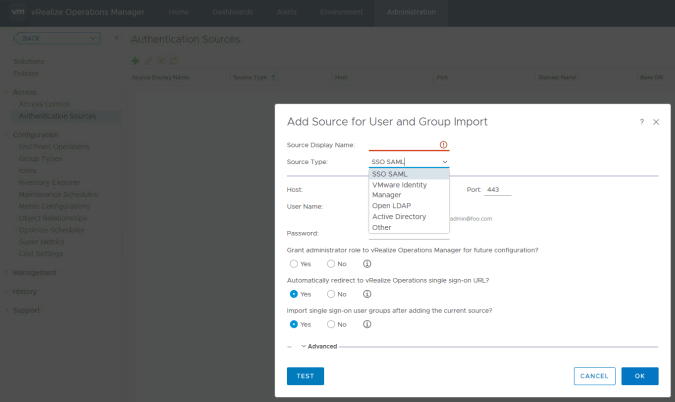
Basic Directory Authentication
There are a few options to choose from including direct AD connectivity and open LDAP which require the user to enter domain/directory credentials.
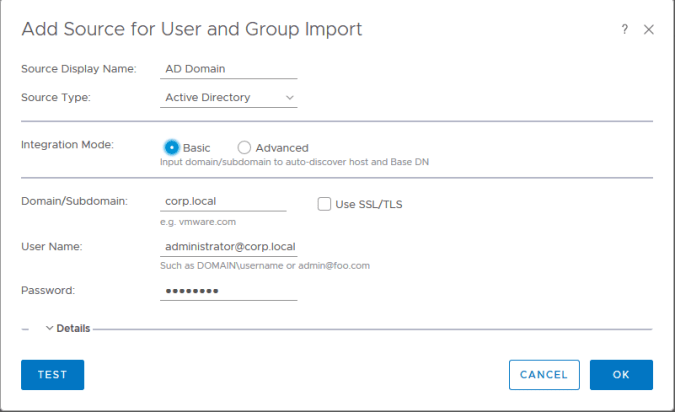
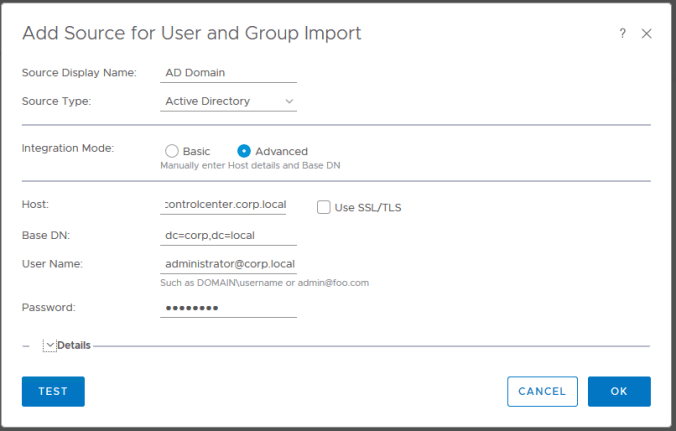
Advanced mode enables you to provide additional search criteria such as base DN and specific host details to use for directory sync and lookup if required. In most cases “Basic” mode is sufficient.
Once a directory has been added and successfully synchronised it should look similar to this:

Using vCenter as SSO
The SSO SAML option allows us to forward authentication requests to vCenter SSO and leverage the directory configuration that has already been configured there, rather than configuring it again within vROPs. You can also choose to import groups that have been created in SSO.
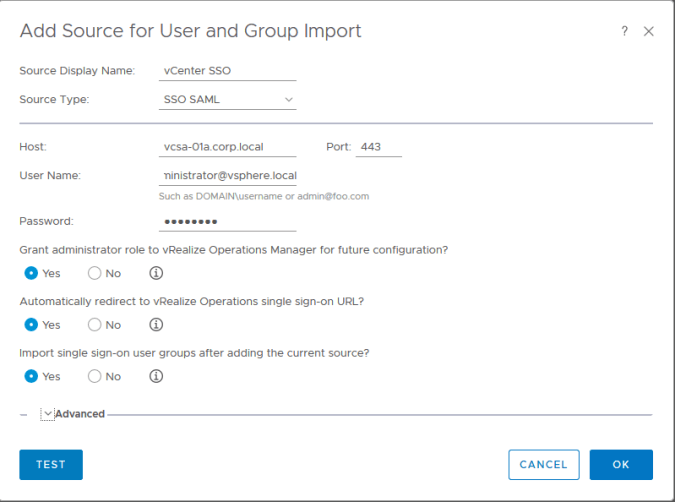
The SSL certificate that relates to the vCenter will have to be trusted by vROPs before this configuration is committed. You will be prompted for this either during the “Test” or “Ok” submission.

Advanced Authentication
For advanced authentication methods (i.e. smartcard/certificate, RSA etc.) an additional component is required in the form of vIDM (VMware Identity Manager). One or more vIDM appliances will need to be deployed to sit alongside vROPs, or alternatively an existing vIDM instance can also be used.
To use any of these additional methods of authentication, vIDM will need to be configured for the directory required and then the appropriate authentication adapters enabled within vIDM. Once this has been done a “vmware identity manager” authentication source can be added to vROPs.
In this example we are going to setup vIDM for an “Active Directory over LDAP” directory source (you could also integrate vIDM into the directory if desired) with certificate based authentication. You need to login as a vIDM system administrator to perform this configuration.
Selecting “Identity & Access Management” followed by “Add Directory” will take you to the screen where the initial configuration can be performed. Note the screenshots here are from vIDM version 2.9.2 however the principal is the same for other versions. You can deploy multiple vIDM appliances under a load balancer for a highly available solution however this is beyond the scope of this article.
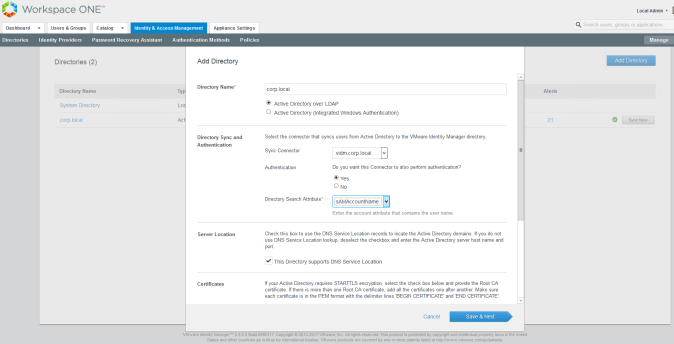
You can select to change the search attribute to universal principal name if required.

Once created vIDM will sync the directory based on the configuration supplied, into its internal database. It does NOT sync passwords, this is always handed off to the directory for authentication.

The next part of the puzzle is to tell vIDM the authentication adapters it can use. This is done by selecting the “Setup” button under “Identity & Access Management”.

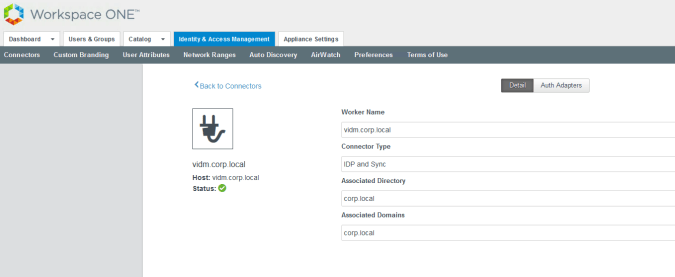
Clicking on the worker hyperlink will lead you to worker configuration page where the authentication adapters can be enabled/disabled and configured.
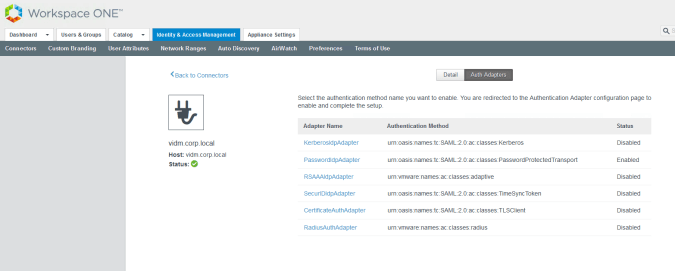
The hyperlink for the required mechanism can be selected and then configured. The password adapter is configured by default OOTB. Here we have selected the certificate adapter which requires the issuing root CA and intermediate CA certificates to be uploaded as well optional fields such as revocation URLs, OID values for certificate policies accepted etc.

Once the adapter has been populated with the required data and submitted it will show as enabled in the list of all adapters.

Now the access policy for vIDM can be amended to require that certificate authentication is used for access. This is done by modifying the “default_access_policy_set”.


The authentication method for the web browser should be amended by clicking on its hyperlink and then changing the authentication mechanism to certificate. A fallback mechanism can be specified if required however if the user base is to be restricted to only one form of authentication then the fallback mechanism can be removed as shown below.
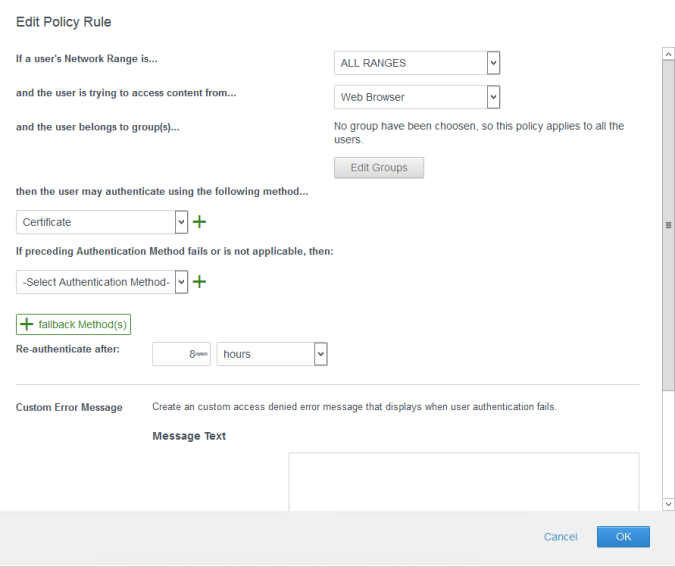
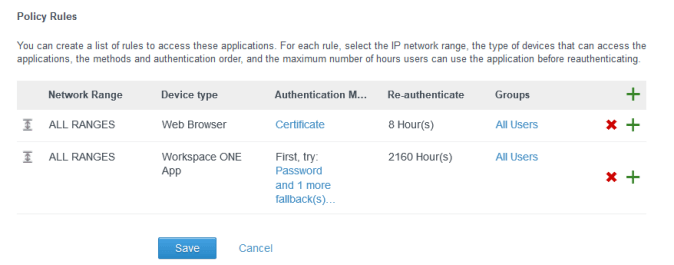
The policy should now show with the following rules and can be saved. The remaining configuration can now be done from within vROPs.
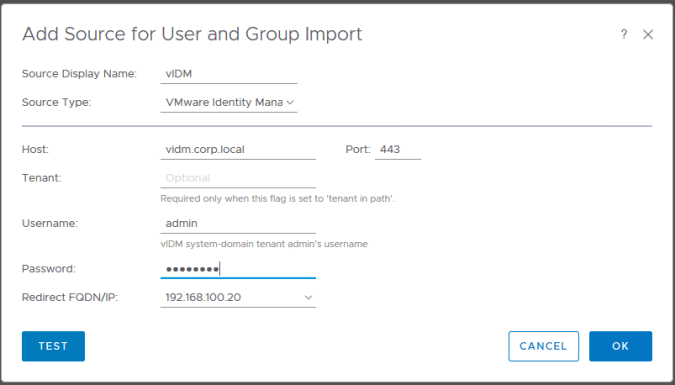
The authentication source type selected should be “VMware Identity Manager” as shown below. The “Redirect FQDN/IP” field tells vIDM were to return the user to once successful authentication has been achieved. This is normally the master node and may require updating if the master node becomes unavailable.

vIDM should now be showing as an authentication source within vIDM as shown below.

Users can now log into vROPs via vIDM using the redirect button. The button will take the user to vIDM for authentication and return them back to vROPs once successfully authenticated.

The user will get read-only access by default. Once users have logged in with their accounts for the first time they will show in the user tab and be clearly marked as users coming from vIDM. From this point a user can be added to a new vROPs user group and assigned the specific access rights required for vROPs access.