This article covers an issue that a few people have reported internally within VMware when deploying new instances of vRA 7.5 using vRSLCM 2.0 (pre patch 1). The issue relates to the vSphere Proxy Agent failing to connect back to vRA due to the proxy agent encountering a certificate trust error.
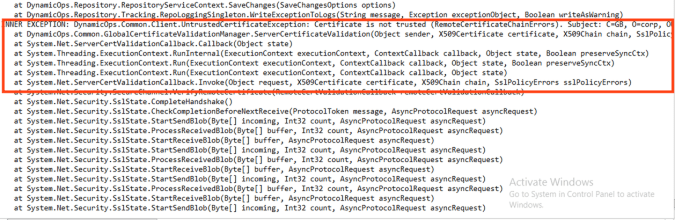
In this example, the vSphere Proxy Agent log file shows a number of certificated based errors. All of them are flagged as multiple variations of trust issues.

The common thread for all the reported instances within VMware is the use of vRSLCM for creating the SSL certificates for vRA to be deployed with. Specifically vRSLCM being used to issue certificates via its embedded CA.
Although the certificate(s) are created and deployed successfully onto the vRA appliance(s) and IaaS component server(s), the proxy agent services fail because they cannot verify the issuing authority for these certificates and as such they are un-trusted. This results in each affected proxy agent failing to report data/results back to vRA and therefore symptoms such as empty fabric groups are likely to be seen.
The certificate installed on this example IaaS box shows the problem. There is no path to the issuing CA even though we have the public and private keys for the certificate.

To fix this issue the proxy agent needs to trust the certificates, therefore the issuing authority certificate (from vRSLCM) must be added as a trusted authority for the computer account on every machine the proxy agent is installed on. Unfortunately there is no nice GUI to help us here so command line it is!
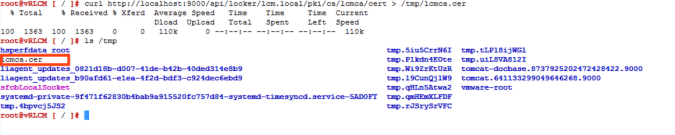
Open a SSH session to the vRSLCM appliance and enter the following command:
curl http://localhost:9000/api/locker/lcm.local/pki/ca/lcmca/cert > /tmp/lcmca.cer
Note: If you want to access the pki instance via a web browser then you can add a rule to ipTables for port 9000 inbound.
The CA certificate used by vRSLCM should be exported to the target location (and filename) specified in the above command. In this example we have exported to the tmp directory.
Once the export has completed, the certificate file needs to be copied out of the vRSLCM appliance. My chosen method is to use an SSH GUI client, in this case WinSCP to perform a drag and drop copy of the file.
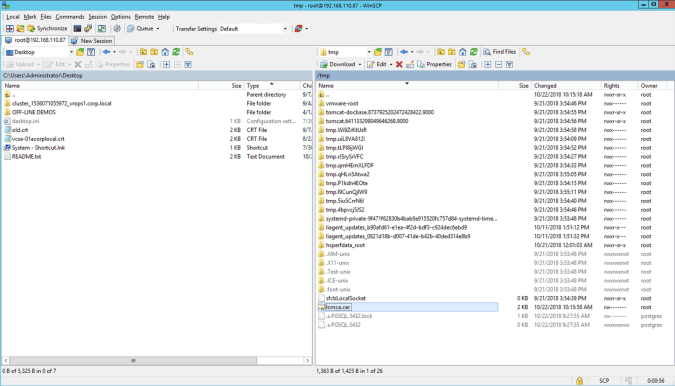
The certifiate can then be copied to each Windows server that a vSphere Proxy Agent has been installed on before being added to the Computer Account “Trusted Root Certificate” store.
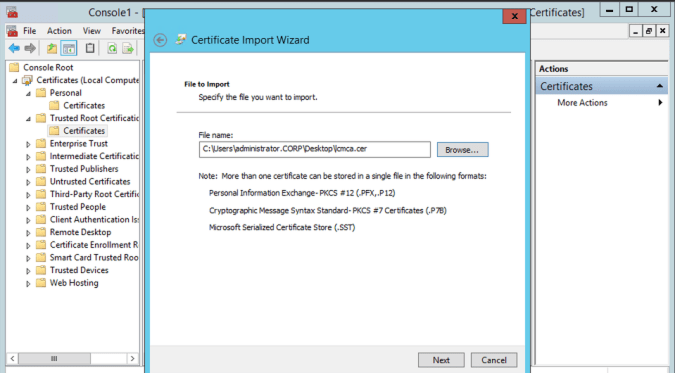
If the import has completed successfully the vRSLCM CA certificate should be listed in the “Trusted Root Certificate” store as shown below.

The IaaS certificate that the proxy agent was not able to trust previously should now show up with a populated certification path.

The last step is to restart the proxy agent services and verify no errors are shown in the log files.

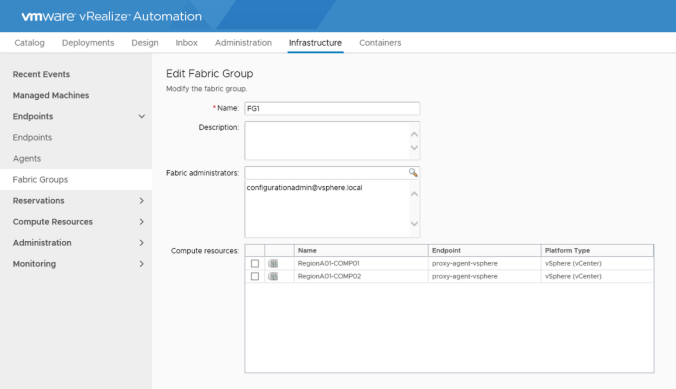
The log files look healthy with no communications errors and the original fabric group now displays resources from vCenter that can be added (previously there were none).

If you have got this far then your issue should now be resolved!
NOTE: This issue has now been resolved in patch 1 for vRSLCM 2.0.
