This article came out of a need to test authentication options other than the embedded identity manager that comes within vRA 7.x. The premise was that embedded vIDM did not offer enough control for customising domain controller selection when using Integrated Windows Authentication (we’ll save this for another article, suffice to say we needed to look at other options).
Here I will cover the process required to integrate vRA 7.5 with a central VMware Identity Manager 3.3 installation as well as cover the implications of such a configuration (it’s not all good).
Deploying VMware Identity Manager
vIDM is deployed as per any other VMware appliance via OVA import into vCenter. I won’t cover the basics here as they are self explanitory (fill in the OVA deployment attributes that you are prompted for e.g. passwords, IP addresses, gateway etc).
There are options to cluster vIDM for high availability and scalability using an external database and cloning deployed appliances however they are beyond the scope of this article. Just note that it is possible and requires load balancing, all of which should be taken into account when thinking about production designs and installations.
Options for advanced configuration changes as well as password resets amongst other things can be found on port 8443 on the appliance as shown below.

Configuring Directory Access
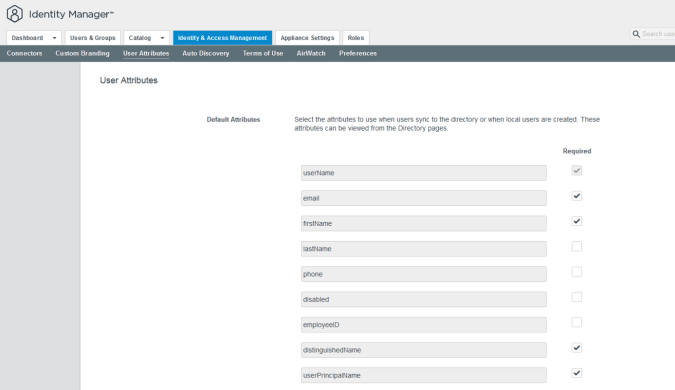
The first step you need to perform is to define the Active Directory user attributes which are required to be mapped to the vIDM user attributes when syncing from Active Directory. Here I have added the email field as required as well as the distinguishedName and userPrincipalName. When a directory is added to vIDM the wizard will force the administrator to provide attribute mappings for all that have a “required” status.
It is important that we have a required field that can be used to match up users in vIDM to users within vRA so that users that vIDM allows to be authenticated can be matched to users that are granted roles and permissons within vRA (more on this later). In this example I am using the email attribute therefore I make this a required attribute and expect my users to have this attribute populated in Active Directory.
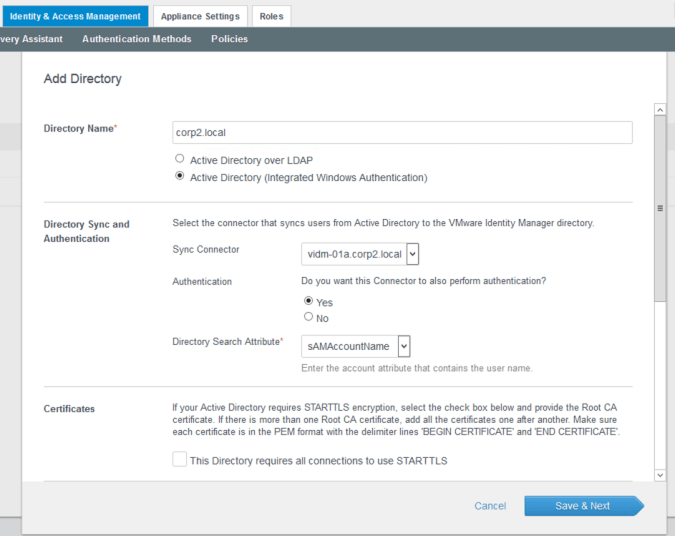
Once the attribute information is saved you can move onto to creating a directory. In my test configuration I will need to cover cross-forest trusts therefore I will be using Active Directory over Integrated Windows Authentication (IWA).
A directory is added in much the same way as within vRA 7.x, providing the same details and authentication credentials as shown below. In this example I am using the embedded connector within the external vIDM appliance however you could equally add external connectors and then select those (outside the scope of this article).
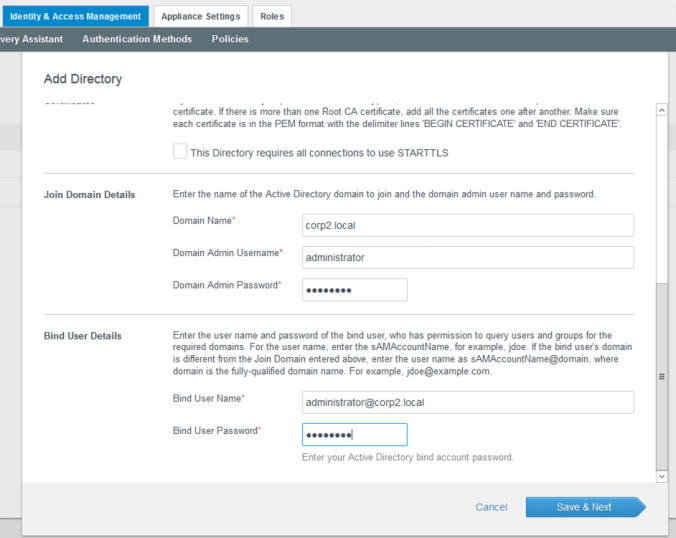
Domains, mapped attributes, groups, users and safeguards are all configured as per embedded vIDM in vRA 7.x (a few of the screens are shown below for reference).

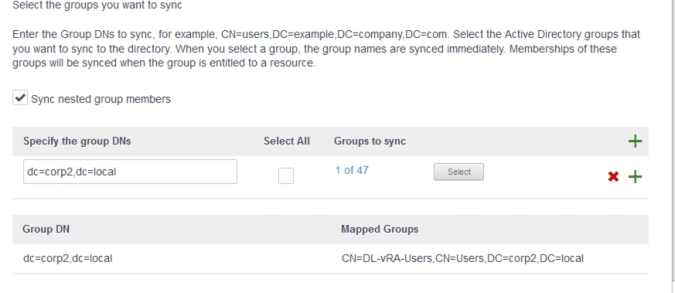
Once the directory has been added it should sync without any errors. In this example I have added a single domain local group which contains a global group from a trusted domain (which then contains 2 users).

SAML Metadata
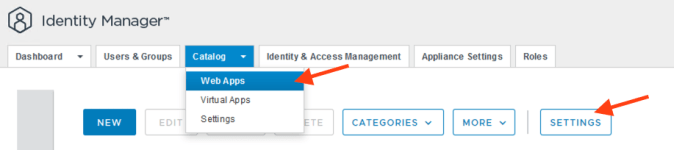
The IDP (Identity Provider) integration from vRA to external vIDM uses SAML therefore we need to locate the SAML metadata that describes the external vIDM IDP. This is located within the catalog settings for web apps in the external vIDM GUI.
Note that the location of the SAML metadata has changed from version to version of vIDM however in version 3.3 it is located as shown in the screenshot below.
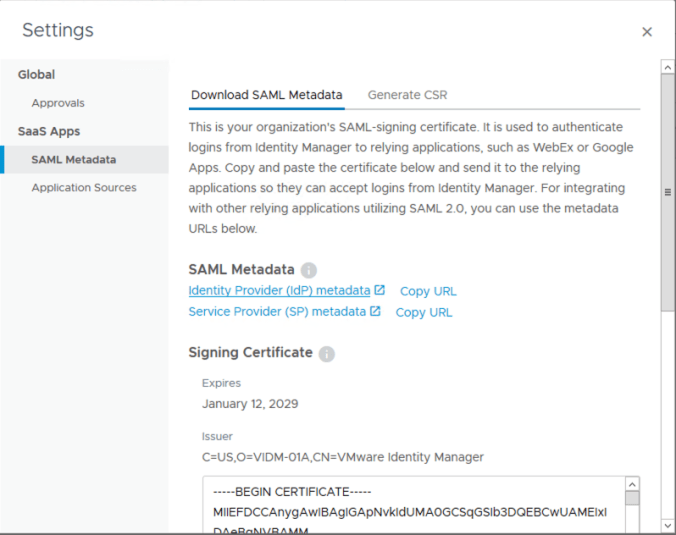
Hitting the IDP Metadata link will open a new web browser tab containg the metadata in XML.
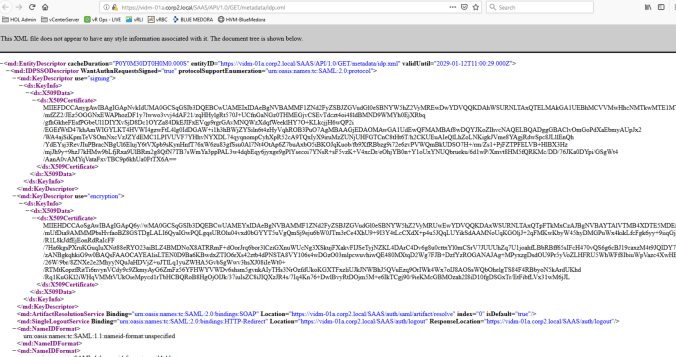
This is important!! We need to copy and paste this metadata so that we can use it within vRA however make sure you look at the page source and copy that rather than the friendly XML presentation above. The friendly view does not include important XML definition information that vRA needs and if you don’t use this then vRA will produce an error.
The page source view looks as follows and it is this we should copy.

Defining an IDP
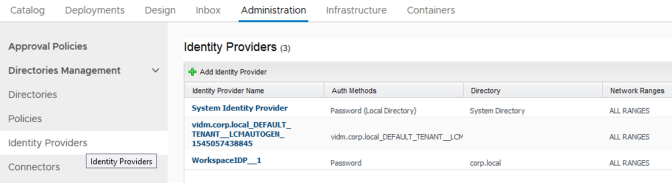
Creating a new Identity Provider is done from the Administration tab as shown below (note that this screen shot contains an existing 3rd party provider I have already created).
The first part of the configuration is to provide a name for the provider and to paste the SAML metadata into box provided. Once that has been done the metadata can be parsed by vRA using the button provided. If there is any error in the XML (i.e. missing characters or copying from the web page rather than the web page source) then the process will fail.
Once the metadata has been processed the ID fields will be populated as per the screenshot below. The values can be left at default.
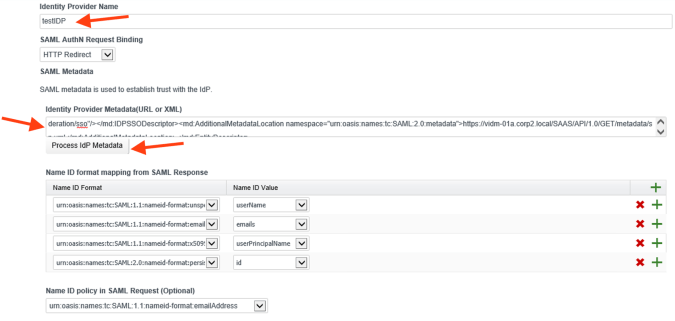
The next thing to configure is the authentication option for the Identity Provider. This means we need to give the option a name which explains what it is for and select the SAML context which will be used for authentication. In this example we are going to be using password authentication therefore I have chosen the context for passwords.

The last thing to do is to access the Service Provider XML using the link at the bottom of the page. You will need this as part of the application definition that needs to be created within Identity Manager. As before, make sure you copy the web page source rather than the content as some of the characters may not show otherwise.

Defining an Application
The last part of the configuration is to define the application within our external vIDM. The application allows you to specify who has access to authenticate to vRA, where they can authenticate from and what to do once they have authenticated (i.e where to send the session etc).
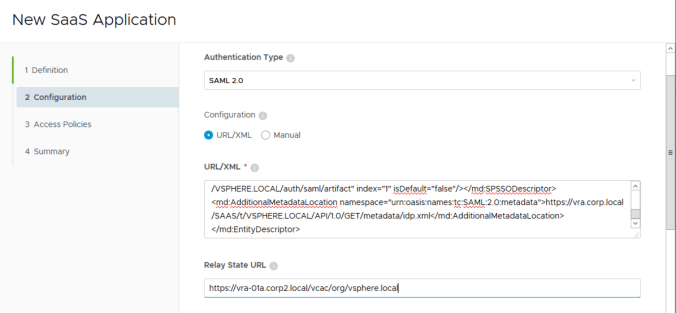
To start you create a new application as shown below.


In the configuration you add the XML copied from vRA and provide the URL to the tenant that we are adding the Identity Provider. In this case we are working in the vRA default tenant.
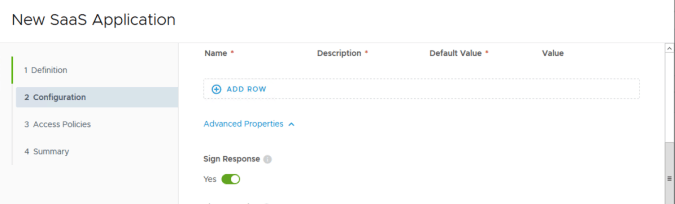
The only advanced option we need is to sign the response.
Lastly you need to link an access policy to the application. The access policy controls the authentication methods to be used for accessing the application and also the the locations (networks) and methods of accessing (i.e. web browser, workspace one etc.) By default vIDM contains a single policy (i.e. the “default_access_policy_set”) as shown below. In production you may need to create separate policies depending on you access requirements.
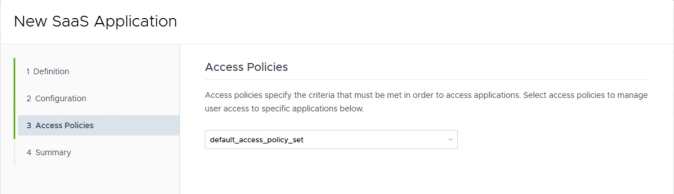
Once the policy has been selected then the application can be saved.
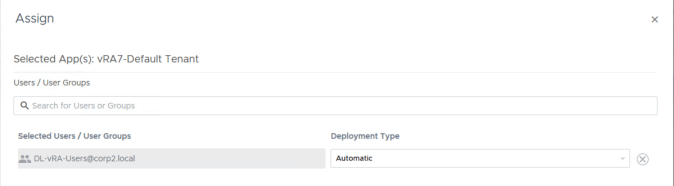
Finally you can assign groups and users to the application using the “Assign” button.
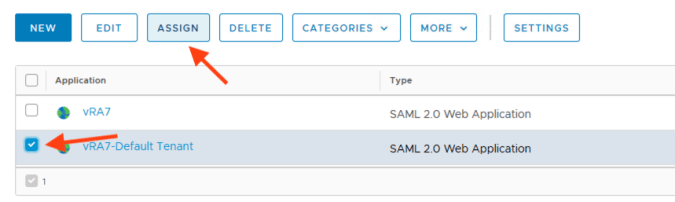
Here I have assigned a domain local group from Active Directory. This completes the configuration.
The Implications
Lets take a moment to think about the implications of this configuration. Using a centralised vIDM does NOT remove the need for vRA to be connected to Active Directory directly. You still need this in order to assign roles and permissions for groups and users as the external vIDM has no concept of the roles and permissions within vRA.
The SAML configuration allows a user that has been granted access to vRA within the external vIDM to be mapped to a user that exists within vRA itself. vIDM provides the gateway authentication into vRA and once there the mapping is used to locate the correct user within vRA which then allows the relevant permissions to take effect. Without a directory connection from vRA itself, this mapping cannot be achieved and therefore a user has no rights within the product.
