I decided to write this article out of necessity, finding that most of our (VMware’s) products now rely not only on our own product functionality for application deployments, configuration and orchestration but also 3rd party solutions. One of the obvious tie ins for vRealize Automation and VMware Cloud Services when it comes to provisioning and application deployment is Ansible.
I’m going to start at the beginning (i.e. getting up and running with Ansible) before I cover playbooks and any of the integrations between VMware and Ansible. This article should provide you all the info you need to get an Ansible server stood up (based on CentOs 7).
Please check out my other Ansible articles which use this Ansible install as a base.
Install the OS
As I mentioned, my Ansible server will be based on CentOS 7 so I have deployed a minimal install CentOS 7 machine. This machine has a user called “admin” created that has sudo rights (added user to wheel group).
In addition I have generated an RSA public and private key on my workstation (windows) machine using the key generator that comes with Putty (for the security conscious among you this is used on a test system only that has access to no other systems). I have placed the public key into the authorized_keys file within /home/admin/.ssh/authorized_keys.

Installing Ansible
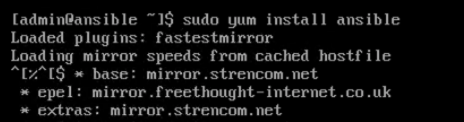
Before you can install Ansible you first need to install the EPEL (Extra Packages for Enterprise Linux) repository. This will then allow Ansible and its pre-requisites (e.g. python) to be installed.

Once EPEL is configured you can kick off the ansible install. This has many packages show I’m not showing them all here.
You will be left with an install within /etc/ansible on your ansible host machine.
Authentication
Ansible communicates with all the machines it manages via SSH. We could configure everything to use basic usernames and passwords but for my environment I am going to leverage SSH keys instead (in the same way I have configured my workstation to authenticate with the Ansible server). This requires generating a public and private SSH key file, placing the public file contents on all the machines you wish to manage with Ansible and the private key file on the Ansible host itself.
As I am already on the Ansible server console I have generated my public and private keys using ssh-keygen which has produced id_rsa (private key) and id_rsa.pub (public key). I could have equally chosen to re-use the public and private keys I created at the start of this article however I wanted different keys for different purposes, one for Ansible admin and the other for Ansible execution.

I’m going to be using Ansible as part of VM deployment process so I have taken the public key file and added its contents to my CentOS template image for my standard local user (admin), also in the /home/admin/.ssh/authorized_keys file. This will enable every VM I deploy to work with SSH key authentication from my Ansible machine once the main Ansible config file is setup (see later in this article).
Adding Ansible Client Machines
Ansible maintains an inventory of the machines it is managing within /etc/ansible/hosts. For a machine to have an Ansible instruction executed against it, it must appear within this file (you can also use additional inventory files instead of relying on one large config file).
Machines can be grouped under headings to allow Ansible to execute commands against multiple machines at once. Here I have created an “AppServers” group and placed a single VM under it.

Ansible Configuration File
In order for Ansible to work there are several global options that need to be defined within “/etc/ansible/ansible.cfg”. Some of these are necessary to allow my install to work with VMware Cloud Assembly which I will cover in a later article.

Ansible has a vault feature that allows you to store sensitive information securely in a selected vault store rather than put it in plain text with any Playbooks or inventory files. The vault has not yet been created for this environment however I am still going to add a path to its password file for future use.

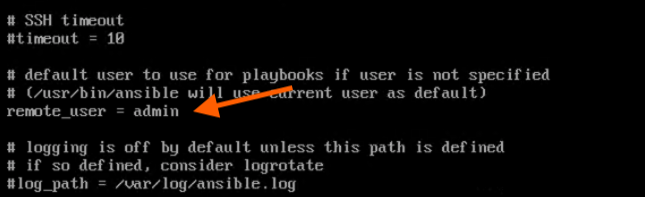
Here I have set the default user that will be used within any future playbooks (unless a user is specifically referenced within the playbook). This user also corresponds to the user I have associated my public key with within my template CentOS image and my single existing server that I will be testing against.
The private key file is the one that we created earlier in this article. This is the key ansible will try to use to authenticate with client machines. Note that I have renamed it to “ansible_private” in this instance.

Ansible Vault and Password File
An Ansible Vault file is an encrypted file created with the command “ansible-vault create INSERT_FILENAME_HERE”. It can be used to store any text you wish to be encrypted by password protecting the vault.
To allow the vault file to be opened by future Ansible playbook executions without requiring the user to specifically enter the vault password on the command line I have created a password text file that contains the vault password. This is the same file I referenced earlier in the ansible.cfg configuration file (/etc/ansible/vault.yml).
The file was created by executing the following (the password will be added later but if you have already created your vault then you can add the password for the vault to this file now).
touch /etc/ansible/vault.yml
Basic Testing
To verify whether Ansible is up and running you can execute several basic commands via the Ansible command. This will verify whether the SSH communication is working.
The first one is to perform an ansible ping to the “AppServers” group I configured earlier in the /etc/ansible/hosts file.

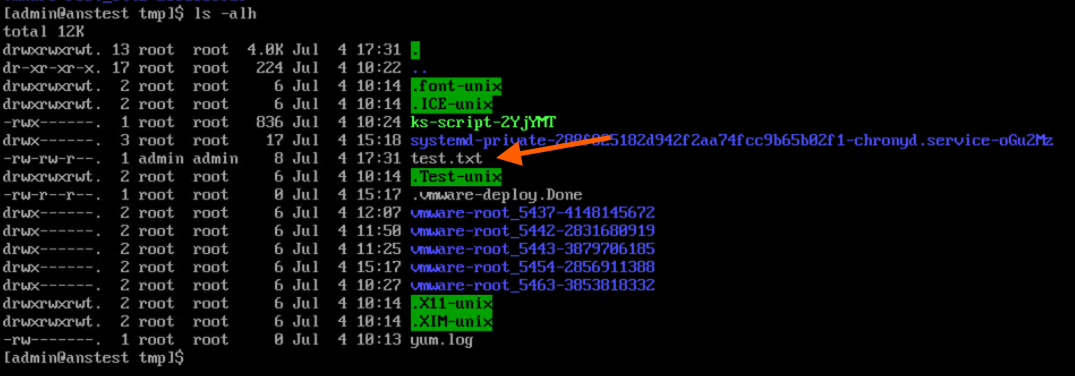
The next test is to perform a basic file operation, in this case echoing a word to a new file on the server within the “AppServers” group.

Everything looks to be working fine. In the upcoming articles we will start looking at playbooks with some more advanced functionality and how we can integrate Ansible into VMware Cloud Services (in particular Cloud Assembly).

Pingback: Ansible – Using the “Vault” | vnuggets
Pingback: Ansible – Getting Started with Playbooks | vnuggets
Pingback: Ansible – Expanding Playbook Functionality | vnuggets
Pingback: Ansible – Lets Talk Windows! | vnuggets