Up until now my journey with Ansible has been solely in relation to leveraging Linux operating systems but as well all know there is more to life than just Linux! Now it’s time to look at Windows and see how we can make that integrate.
For this article I am going to be using a standalone Windows 2016 VM as my target machine. Lets get started.
WinRM
With Linux life was easy, everything could be done via SSH connectivity. Whilst Windows can be configured for SSH, its integration with Ansible is classified as “use at your own risk”. For this reason I am going to be concentrating on WinRM (Microsofts implementation of the WS-MAN protocol) which is a SOAP based protocol included with Windows.
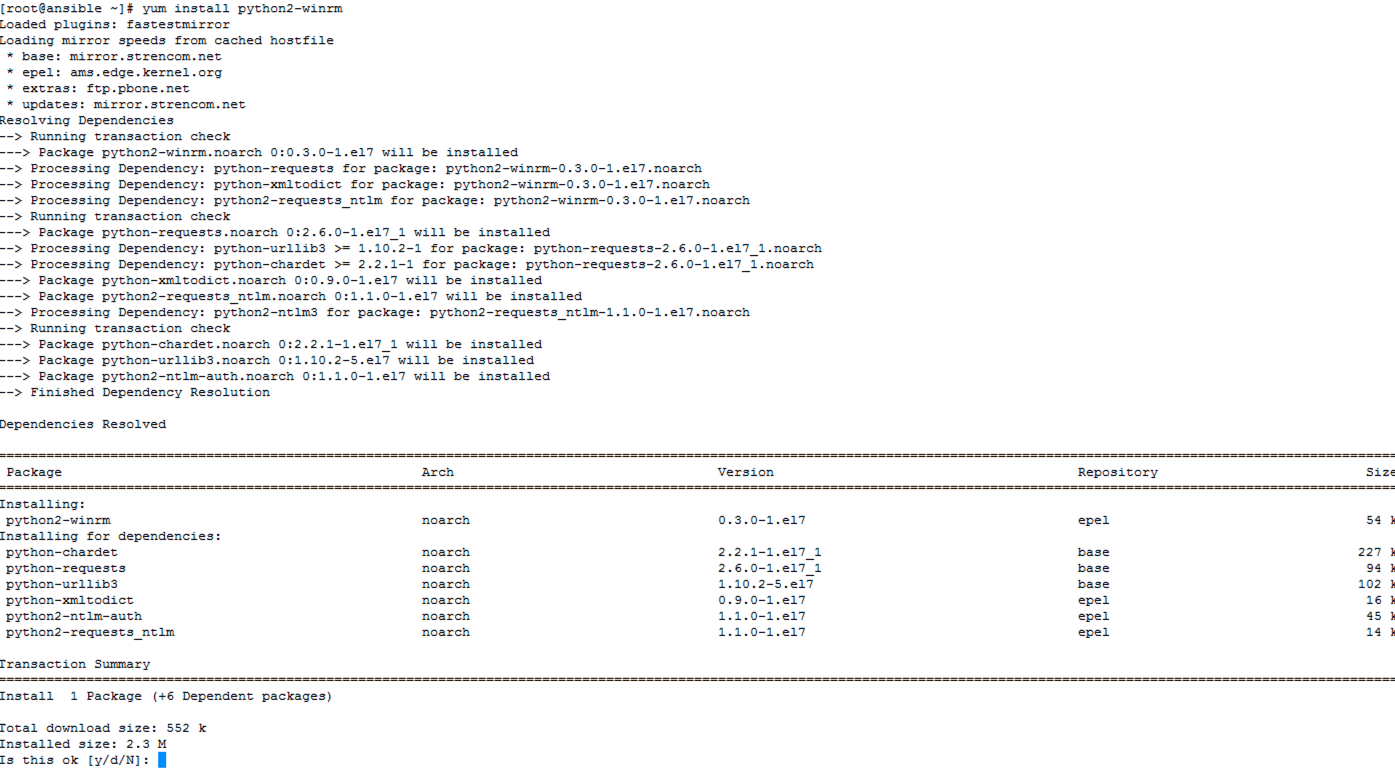
The first step is to make the Ansible server talk using this protocol which requires additional packages. Here I am using “yum” to install the “python2-winrm” pacakge and its dependencies (you could also use “pip” to install “pywinrm”).
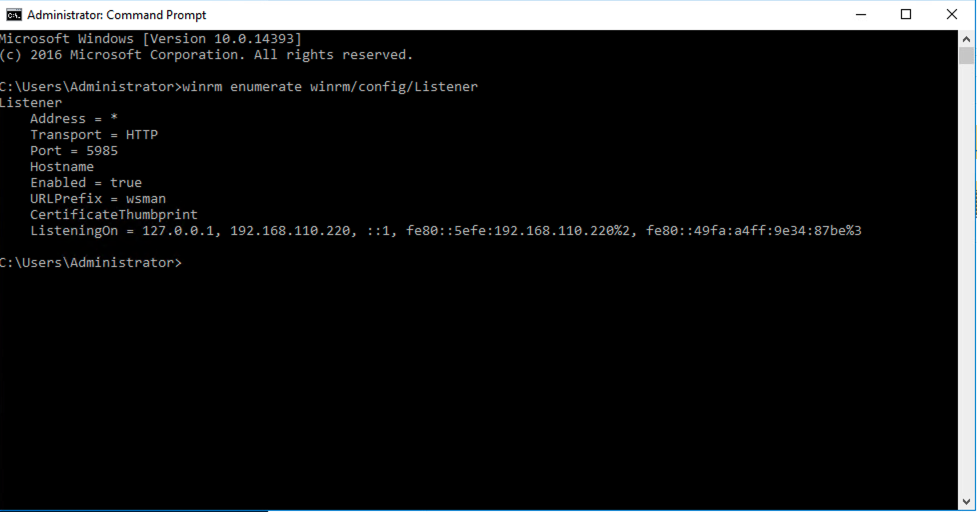
The Windows 2016 target machine I am using needs to have its WinRM configuration set, which dictates authentication mechanisms and other options/settings that incoming connections can use. For this first step with Windows I am concentrating on unencrypted basic authentication, a “walk before you run” implementation. Other methods (which are obviously more secure) are available and I will cover some of those in a later article. For now I am just proving the concept!
Out of the box Windows 2016 comes with a single HTTP listener configured (i.e. the configuration that Windows using to listen for incoming connections).
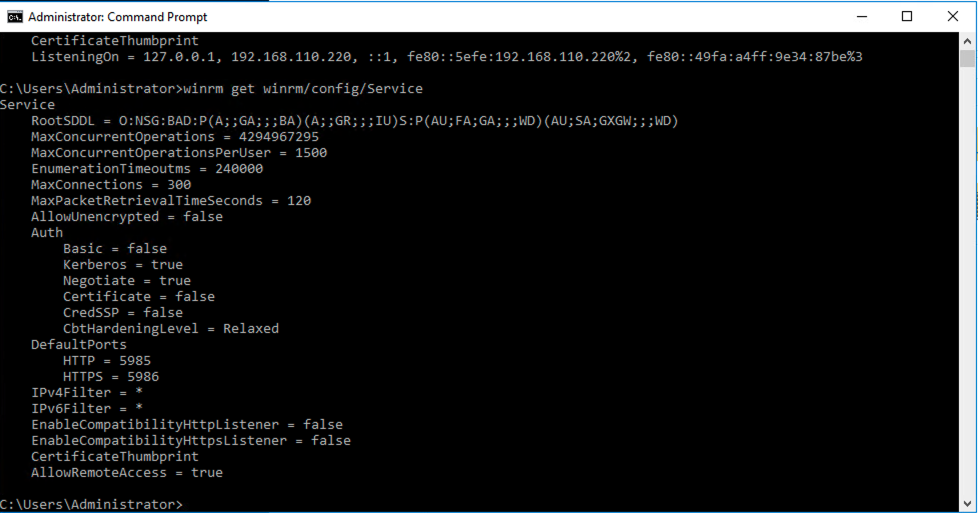
The “Service” settings control the options that are enabled/disabled globally.
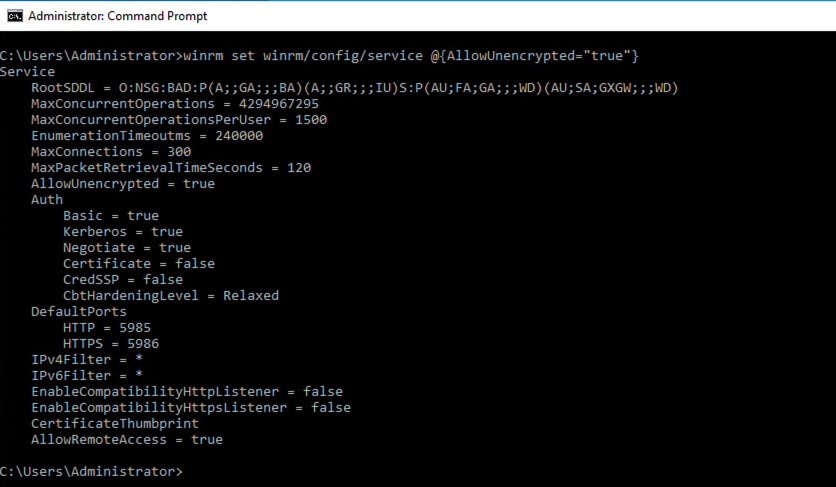
For this first setup I have enabled unencrypted basic authentication to allow me to do some basic testing without getting bogged down with troubleshooting issues that come with other more advanced authentication mechanisms and protocols.

Inventory and Variables
Ansible (when used with Linux machines) leverages SSH for connectivity and only requires the admin to add the necessary settings for the username, password and any certificate keys in order to make things work. When it comes to Windows there are a few more settings to configure.
Here’s a section from my “hosts” file in “/etc/ansible”. As well as a new group (called “Windows”) I have also added a variables section for the group (“Windows:vars”) to allow me to provide the necessary settings to leverage WinRM.
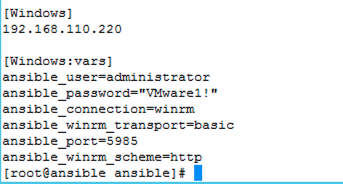
I am specifically telling Ansible to use the above variables whenever it connects to the hosts within the “Windows” group. The protocol and connection details match the WinRM configuration I applied to my Windows 2016 server earlier.
The above variables could be directly added to a Playbook or used in a group variables file instead of populating the hosts (or any) inventory file but for this first test simple is best.
Testing Connectivity
If you remember my previous article when the Ansible platform was first stood up (https://vnuggets.com/2019/07/04/ansible-getting-started/(opens in a new tab) I used an Ansible ping mechanism to verify all was working ok between the Ansible server and a client machine. There is a similar method for Windows called “win_ping”. Here I have used it with the -vvv option to output any error messages.
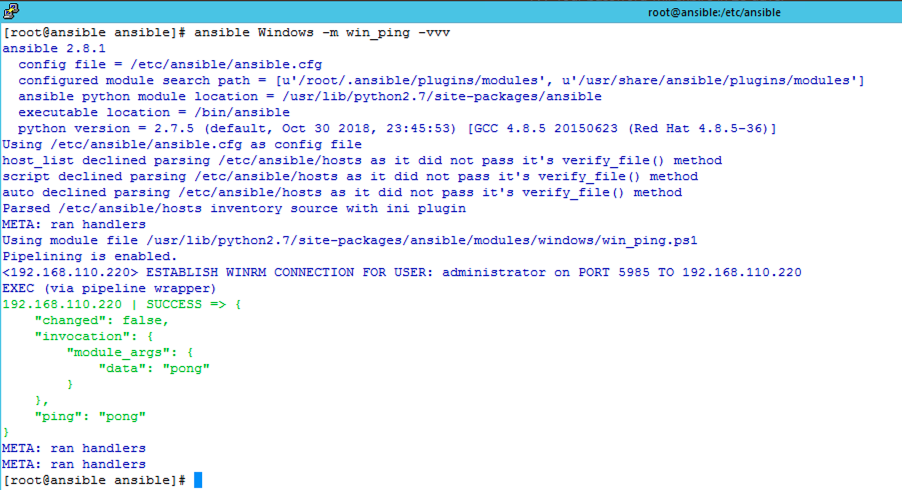
All looks to be working ok. From this point you can start to leverage Playbooks in the same way as previously covered however there are specific modules for working with Windows (https://docs.ansible.com/ansible/latest/modules/list_of_windows_modules.html).
In my next article I will start looking at more advanced connectivity/authentication options as well as some example use cases.
