In this article I will show you how to create a custom group in order to use multiple policies within a vROPs environment. Remember, if we want a policy other than the default policy to be applied to one or more objects then we must group those objects together and apply the policy to the group.
Custom Groups allow you to group objects together based on search criteria and filters. Their contents could be anything from virtual machines to clusters, folders, hosts etc. Here we will create a group for all of a clusters virtual machines together.
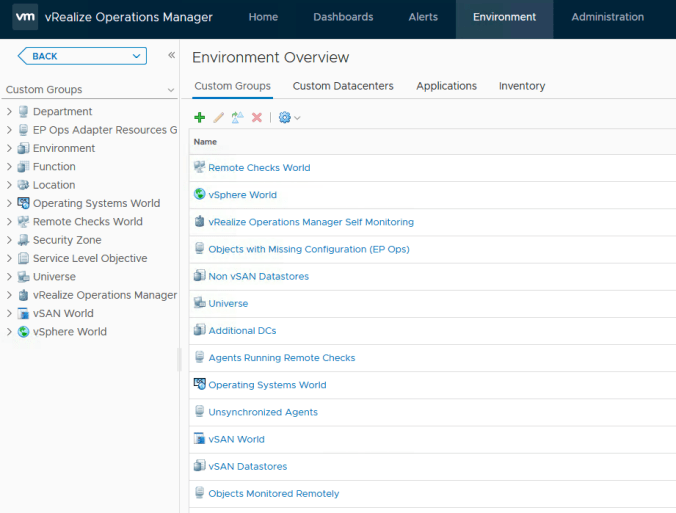
To start the creation of a custom group go to the “Environment” tab.
Use the green plus icon to start the new group addition process. The “Group Type” is a classification or tag and allows to categorise custom groups. If there is no type that fits your requirement then a new type can be created (not shown here). A policy must be specified so for now we will select the default policy that is applied to our environment.

By using the check box in the screenshot above we can ensure that the custom group membership will always be kept up-to-date as different objects meet or no longer meet the membership criteria we will define int he next step.
Object Type
We must tell vROPs what type of objects the group is for. In our example the group is going to be for virtual machines so we select “Virtual Machine” from the “vCenter Adapter”.
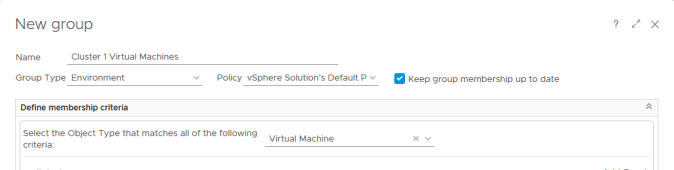
To populate this group with our clusters virtual machines, selection criteria must be defined using a combination of drop down lists and free text boxes (depending on what information is being used to define the criteria). Sometimes there are several methods of defining membership using different sets of information and properties.
In this example we are going to use properties and from the summary property obtain the parent cluster information. We will then match this information against a cluster in the vROPs inventory. This looks as follows:

Additional criteria can be added if required by repeating the membership process using the “Add another criteria set” hyperlink.
Once all the criteria are defined the “PREVIEW” button can be used to validate that our criteria can correctly fetch all the required objects.

Our custom group will now show up in the custom groups tree under the “Environment” heading. From here we can see any alerts etc. that are currently showing against the group as well as the overall health
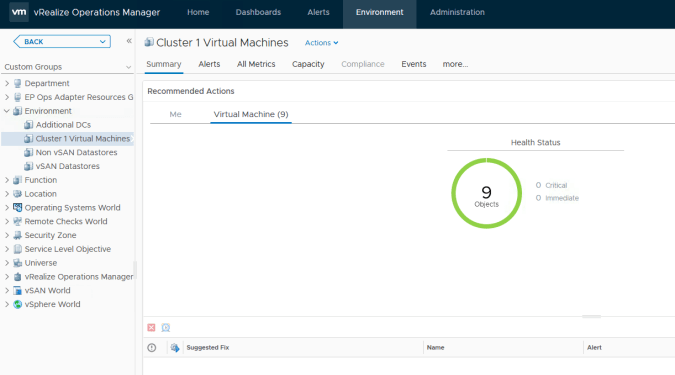
Now that our group has been created we can create a new policy if required and link the policy to the group. Remember that a group can only be linked to one policy.

Pingback: vRealize Operations 6.7 – Policies | vnuggets
Pingback: vRealize Operations 6.7 – Custom Dashboards | vnuggets