This is the second article from a series covering the use of vRSLCM with source control. Links to the other articles in the series can be found at the bottom of the page.
In part 1 of this series of articles we covered installing Gitlab onto a server, in my case a CentOS 7 virtual machine. At this stage your Gitlab server should be up and running and you should be able to reach the URL you configured. Here’s mine:
1. Admin Password
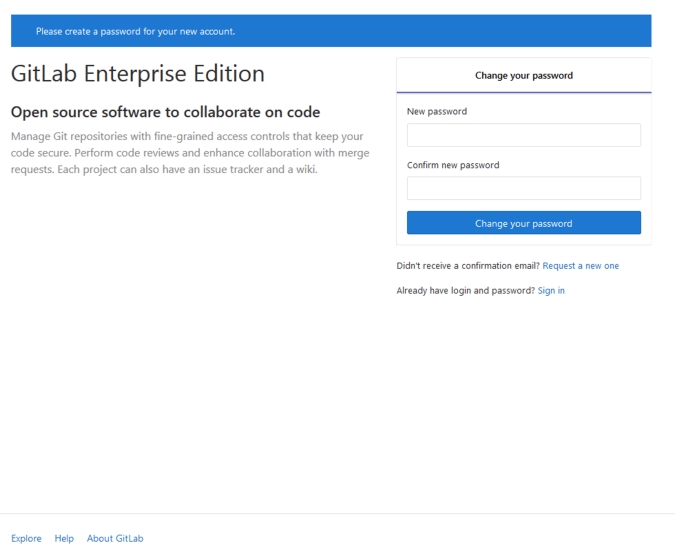
The first thing that needs to be done is to define the password for the admin account using the fields provided on the login page. This user represents the root account of the server which by default is configured with an email address of admin@example.com. You can login as either root or the email address.
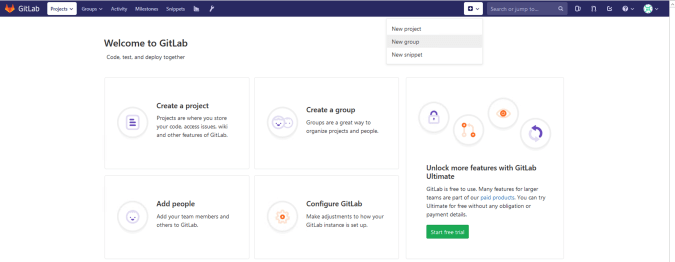
Once you are logged in you will be met by the default jumping off page.

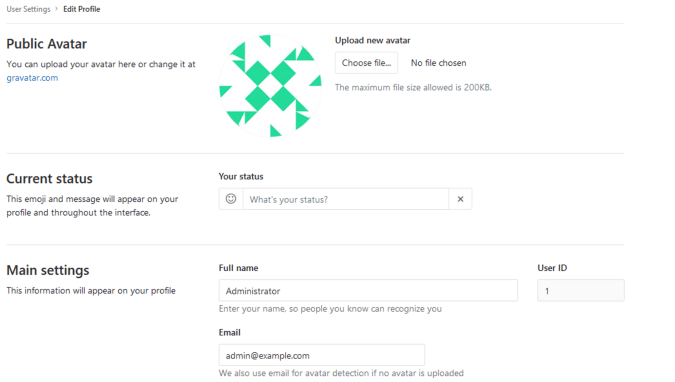
The details of the admin account can then be set as appropriate using the profile menu.

2. Users
New users can be defined via the “Admin Area” as shown below.

As an administrator, you can impersonate another users account for testing access rights etc by opening the user and selecting “Impersonate”. This will launch a new session as that user without needing to login.

2. Groups
At this point you should have at least one admin account that can login and potentially another user if you have chosen to do that. The next task is to create a “Group” which will be where we create a project (see next section).
You can create a group from either the top menu bar or from the welcome page.
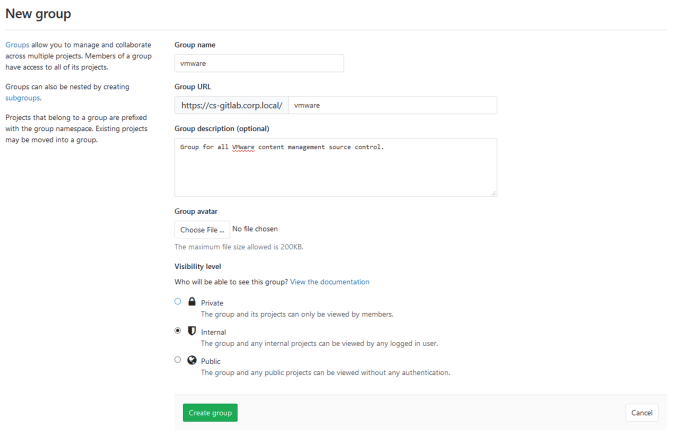
Here I have created a group called “vmware” and set its visibility so that all users who login to Gitlab can view the project. Note that you may want to mark your project as private.
Once the group is created it can have members assigned to it. I am going to assign my user “newuser” as a member of this project with a role of “Maintainer” (I’m not going to cover all the roles and permissions here but it is covered in the Gitlab documentation).
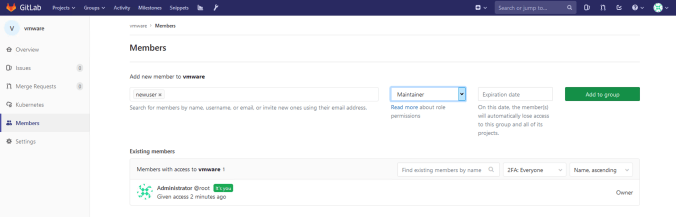
The group members now look as follows.

3. Projects
The “project” is where the content from vRSLCM will be pushed/pulled to/from. Within the project there will eventually be multiple branches (including the master branch). Each branch will store a component/configuration ingested into the vRSLCM content management engine and source controlled by Gitlab. The project history will record the changes in each branch.
A new project should be created for use by vRSLCM which is linked to the group we created in the previous section of this article.

The project should be named appropriately (in this case I have called it vrslcm) and the group selected from the dropdown list. Using the “Initialize” option will allow the repository to be immediately visible/usable by placing a default readme file into the master branch of the project repository.

4. Access Tokens
Access Tokens are used by other systems that need Gitlab API access. They are granted within Gitlab against a particular user and used by other products to authenticate into the API. An access token needs to be created for vRSLCM as it will use API communication to Gitlab to carry out all operations for source control.
To create a token for vRSLCM you need to navigate to “User Settings” -> “Access Tokens”. vRSLCM needs all 3 scopes as shown below.

Once the token has been created it will be listed as active. Before you move away from the page you MUST copy the token as it will not be visible at any other time. If you do not do this then you will need to create a new access token.

Note that the token can be revoked at any time if required. Tokens are linked to the account that has created them and are only visible if you are viewing the settings of that account.

In the next article we will look at how to configure vRSLCM to use Gitlab for source control.
5. Other Articles in this Series
- Part 1 – Installing Gitlab
- Part 3 – Linking vRSLCM to Gitlab
- Part 4 – Capture, Testing & Source Control
- Part 5 – Capture, Testing & Source Control for User 2

Pingback: vRealize Suite Lifecycle Manager – Content Source Control with Gitlab (Part 1) | vnuggets
Pingback: vRealize Suite Lifecycle Manager – Content Source Control with Gitlab (Part 3) | vnuggets
Pingback: vRealize Suite Lifecycle Manager – Content Source Control with Gitlab (Part 4) | vnuggets
Pingback: vRealize Suite Lifecycle Manager – Content Source Control with Gitlab (Part 5) | vnuggets