This is the third article from a series covering the use of vRSLCM with source control. Links to the other articles in the series can be found at the bottom of the page.
In part 2 of this series of articles I covered setting up Gitlab with users, groups and projects together with granting API access for vRSLCM to use. In this article I will be configuring vRSLCM to use source control using Gitlab.
1. Adding Source Control Access
Before a Gitlab endpoint can be configured the API access token for Gitlab that we created in the previous article needs to be added to vRSLCM. This is done by adding a source control server as shown below.

It’s worth noting here that the information you put into the server name field should NOT include “https://” despite what the contextual help tells you. Just use the FQDN of the Gitlab server. If you are using “http” then specify the server name as “http://FQDN”.
Currently with version 2.0 of vRSLCM there is a bug in the Gitlab endpoint validation workflow which fails if you provide the “https” URL. Providing just the FQDN makes the validation workflow assume HTTPS is being used and then completes without errors.
In this environment I have configured Gitlab for SSL connectivity so I am using the FQDN only.

Once the Source Control Access server has been added it needs to be edited so that the Access Token can be added.
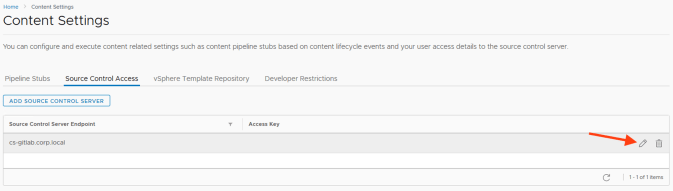

The addition of the access token is not validated in any way at this time, it is just stored against the server.
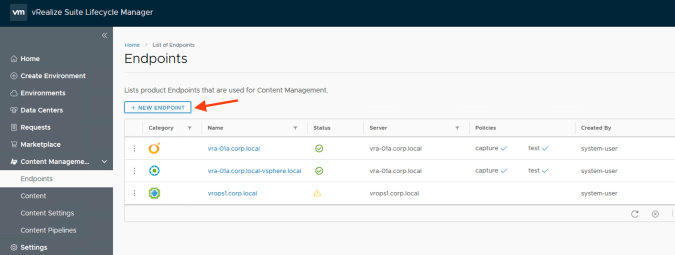
2. Adding a Gitlab Endpoint
Once the access token has been added to the source control server the Gitlab endpoint can then be added. This is the same process as adding any other endpoint to vRSLCM however there are some additional fields which are specific to Gitlab.

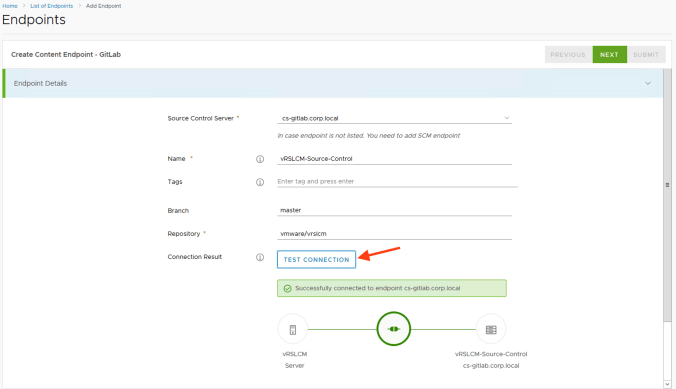
The Gitlab source control server should be listed in the first dropdown list when creating the endpoint. If it is not then you will be able to go no further.
The name of the Gitlab endpoint is up to you. It does not have to bear any resemblence to the server name but it should be something that allows the user to recognise it. The branch name should be left at master unless you have specifically created a branch in Gitlab to use. Finally the respository name should be in the format “group/project”. In the instance I have built this is “vmware/vrslcm”.
The connection to the endpoint should be tested before committing the configuration. This allows vRSLCM to make sure it has the correct level of access and that the endpoint is working.
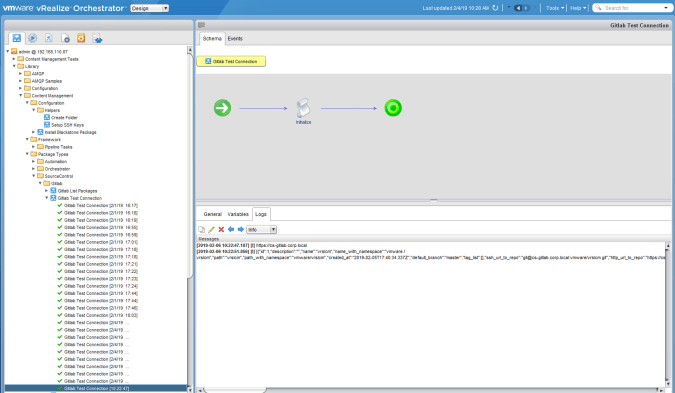
If the test fails for any reason then you can open up the embedded Orchestrator instance that sits on the vRSLCM appliance and look at the logs for the validation workflow as shown below. Note that to gain access to the Orchestrator instance you will need to open up port 8281 through ipTables (see the vRSLCM documentation).
Once all the info has been provided and a successfully test connection has been established the configuration can be submitted to vRSLCM to store.

The endpoint will then be displayed in the list of content management endpoints as shown below.

In the next article I will cover how the integration works with Gitlab and how you use it for source control as part of the capture and release process.

Pingback: vRealize Suite Lifecycle Manager – Content Source Control with Gitlab (Part 1) | vnuggets
Pingback: vRealize Suite Lifecycle Manager – Content Source Control with Gitlab (Part 2) | vnuggets
Pingback: vRealize Suite Lifecycle Manager – Content Source Control with Gitlab (Part 4) | vnuggets
Pingback: vRealize Suite Lifecycle Manager – Content Source Control with Gitlab (Part 5) | vnuggets