This is the fourth article from a series covering the use of vRSLCM with source control. Links to the other articles in the series can be found at the bottom of the page.
In part 3 of this series of articles I covered adding the endpoints into vRSLCM and getting ready for content capture and source control. In this article I will be covering capturing, testing and performing source control on content from a vRA 7.5.0 platform (including embedded vRO).
1. The Content
Before you can do anything with source control you must first have something to ingest into the content management engine and then actually capture it.
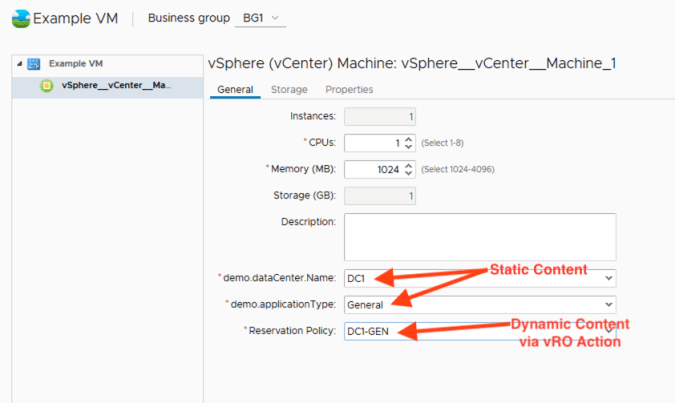
The content for ingestion for this article will be two composite blueprints. They are essentially the same as each other and share the use of the same custom properties via a custom property group as well as a vRO action that powers a drop down list on the request form. The importance of the shared content will become relevant in the next article.

2. The Simulated Process Flow
To demonstrate content management and source control I am going to simulate the following actions (User 2s’ story will be covered in part 5 of this series).
- User 1 creates a blueprint and associated vRA config and vRO actions
- User 1 captures the content
- User 1 tests the content
- User 1 places the content under source control
- User 2 develops new content utilising configuration used in user 1s’ blueprint
- User 2 updates some of the shared content to make it work for them
- User 2 captures their content and tests it
- User 2 places their content under source control
3. User 1 – Capture
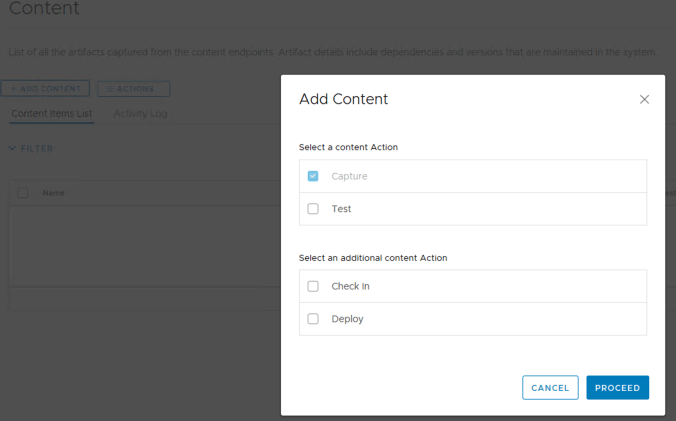
User 1 has created the “Example VM” blueprint and associated properties, groups and vRO content. To capture this content our user now logs into vRSLCM and selects the “Content Management” services and “Add Content”. At this stage we are just ingesting the content so we are not going to perform any other actions.
The capture endpoint will be the vRA tenant where the content resides as it is a blueprint that needs to be captured. The content type is selected accordingly (note there are other types depending on what needs to be captured). Selecting the “Get Latest Content” option forces vRSLCM to refresh its inventory for the specified content type.
As the blueprint is using other items such as property groups, property definitions and vRO actions the “Include all dependencies” option is being used. This will capture everything that the blueprint is using. Note this is not mandatory but if you want to deploy this blueprint to a new endpoint for testing or releasing to production then it ensures all the necessary components are present.
The vRO package name can be left blank or a specific package name an be provided. If the name is left blank then vRSLCM will place all the vRO components that the blueprint needs into a vRO package named the same as the blueprint. This will then be captured as it is a dependency. Alternatively you can enter a specific package name if there is something you want to use.
A meaningful description is a must as this flows through to versioning and source control!

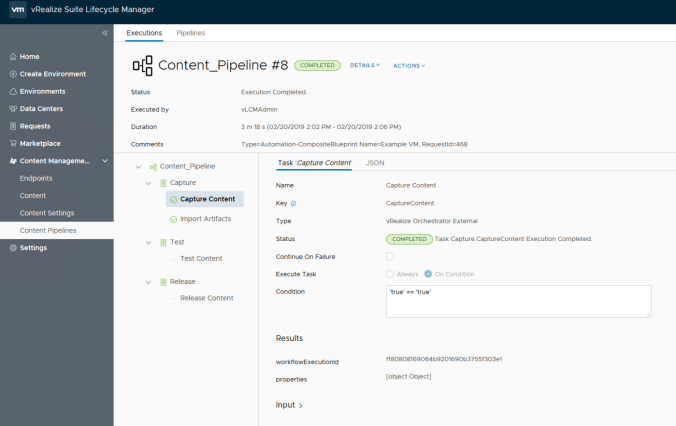
Once the capture is submitted the content management engine will run through a number of stages. The stages that execute depend on whether we are capturing, testing or releasing content.
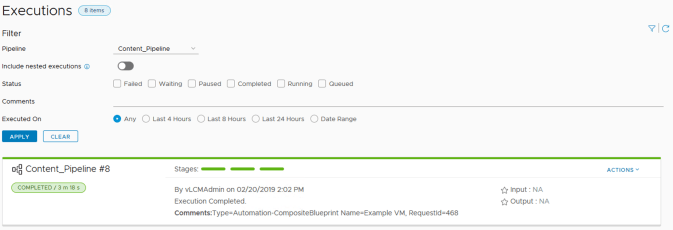
In this case user 1 is just capturing so only the capture and import part of the pipeline is executed as shown below.
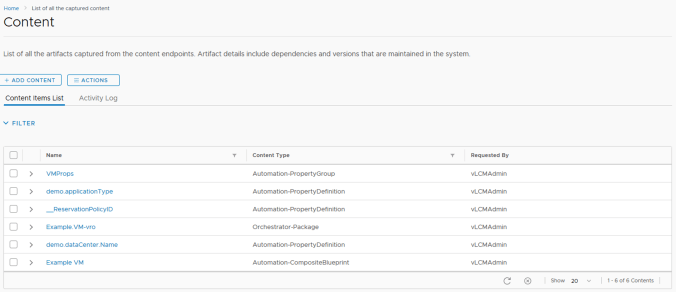
The content section of vRSLCM now has items listed. The captured item and its dependencies are listed as separate items. Property groups and property definitions are also called out as individual items.
4. User 1 – Testing
Before content is released to production it should normally be “tested”. vRSLCM handles testing in a few ways including:
- Deploying content to an endpoint designated as a “test” endpoint
- Carrying out automated testing
A test endpoint can be the same stack as used for development or it can be a completely different stack. It could also be a different tenant within the same stack.
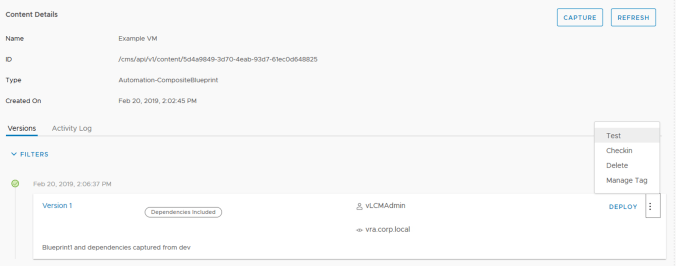
To deploy content to a test endpoint the user needs to select the content concerned (in this case our Example VM blueprint) and locate the version that was capured. As the capture was only done once there is only one version listed. Using the sub-menu a “Test” can be initiated.
An endpoint designated for testing must be selected in order for a test of content to be performed. A number of options surrounding how test failures should be handled can also be selected. In this instance I want to:
- run unit tests (we’ll cover these shortly)
- stop tests on the first failure
- include all dependencies
I am not deploying content as in my case the development endpoint is also my test endpoint. In other words my content I want to test is already there. If I were to deploy the content then I would be overwriting the content which in this specific case I do not want to do.
Finally, the unit test server (i.e. the vRO instance that will run the unit test workflows) can be selected. In my case this is the same vRO instance that belongs to my development vRA stack however if you have a separate test vRA stack or dedicated test vRO instance then you would select the relevant vRO instance here.

The vRO server/instance designated for testing has the unit testing workflow package deployed to it automatically by vRSLCM. The workflows in the package are basic and perform simple checks such as “does the content exist on the test platform?”. You can add your own custom workflows for testing and if the workflow name matches the name of the component you are testing then the custom test will only be run for that specific component. Anything within the common folders will be run for all content type matches. Workflows placed one level up run only if the names are matched.

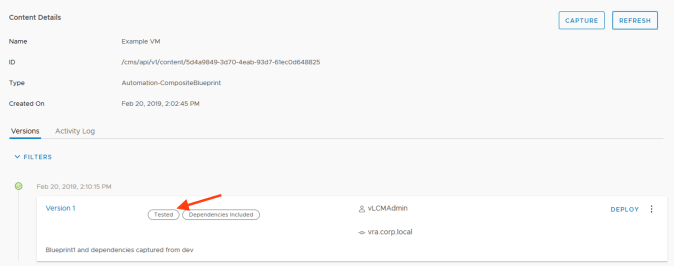
Once testing completes successfully the version will be tagged as “Tested”.
5. User 1 – Checking In
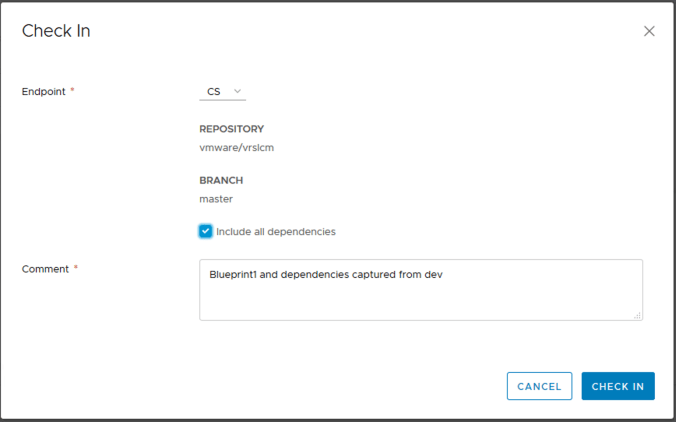
Now that the “Example VM” blueprint and its dependencies have been tested I want to put the content under source control (i.e. tracking and managing the changes). I do this by performing a “Check In” action on the version of the content that I want to source control.

The Gitlab endpoint should be selected and I am going to include all dependencies.
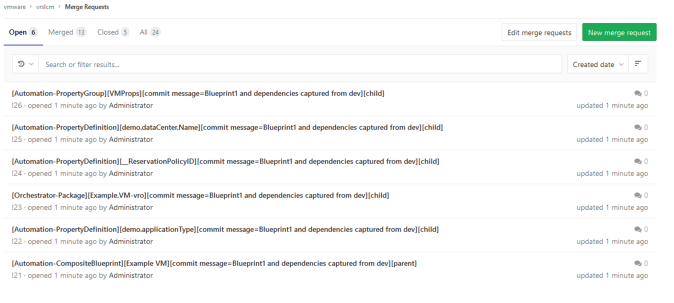
Once “Check In” has been completed the project in Gitlab will have a number of new branches added, each one related to a different piece of content.
The “Master” branch is the part of the repository that contains the stable content (i.e. where everything that has been checked, verified and approved by somebody resides). Anything in other branches is new content that has not been approved for merging into the master branch.
Any new branch that is created contains a copy of the master branches content plus the new content being sent from vRSLCM. In this case our master branch was empty at the start so eahc branch only contains the individual new contents.

I can browse each branch and check the contents to make sure I am happy with what is about to be merged ino the master code base. Here I am looking at the branch that contents the vRO package and custom action.

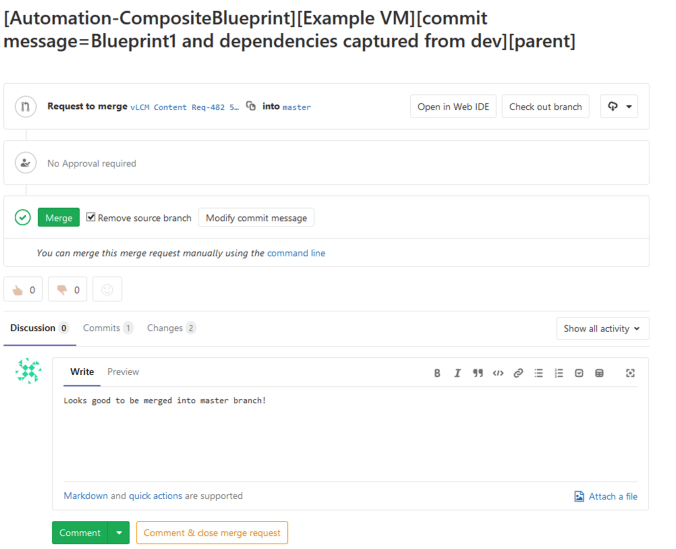
A merge request is automatically created for every branch and its contents with each request named in a way that represents what it contains.
If the Gitlab code maintainer (in this case that’s me) is happy that each branch can be merged into the master then each merge request should be approved using the “Merge” button.
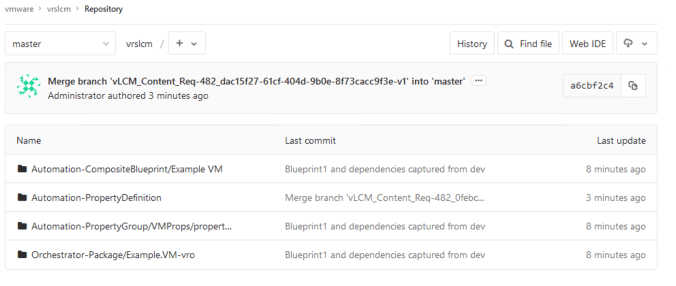
After all branches have been merged, only the master branch is left in the repository.
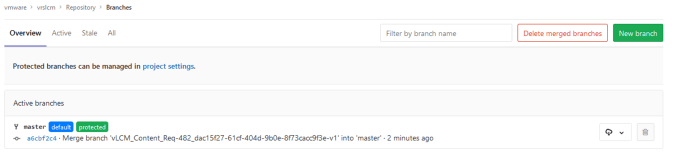
The master now contains all the content that has been submitted to it from vRSLCM as part of the “Check-In” and is the new gold standard base level of content.
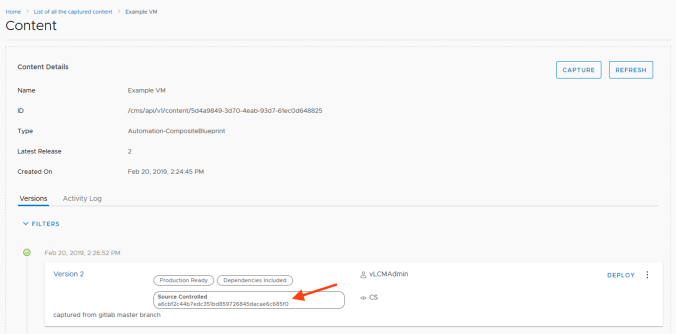
Once our content is under source control we need to capture it from Gitlab back into vRSLCM. This will create a new version in vRSLCM that is tagged with the Gitlab commit hash value from the merge request operation.
The capture process is exactly the same as the initial capture with the exception of selecting the Gitlab endpoint. In this case I am also marking the version as “Production Ready”. I am capturing all dependencies back into vRSLCM so a new version of each piece of content will be created, each tagged with the commit hash value that relates to the relevant branch that was merged into the master branch.


A new version of each piece of content captured out of Gitlab is created in vRSLCM tagged with the commit hash value.
Deploying this content to an endpoint can then be performed to reset code/content levels to a new base level.
In the next article I will show you what happens when shared components from our Example VM blueprint are changed by another person for use in a second blueprint.

Pingback: vRealize Suite Lifecycle Manager – Content Source Control with Gitlab (Part 1) | vnuggets
Pingback: vRealize Suite Lifecycle Manager – Content Source Control with Gitlab (Part 2) | vnuggets
Pingback: vRealize Suite Lifecycle Manager – Content Source Control with Gitlab (Part 3) | vnuggets
Pingback: vRealize Suite Lifecycle Manager – Content Source Control with Gitlab (Part 5) | vnuggets