Overview
In this second part of my PKS Getting Started series I am going to cover getting Ops Manager and BOSH Director stood up. Ops Manager provides an API and GUI for the deployment and upgrade of Pivotal components so in my case I am going to use that for deploying PKS (as well as its future upgrades).
Other articles in this Getting Started series include:
- Part 1 Overview
- Part 2 Ops Manager and Bosh
- Part 3 NSX-T Prep
- Part 4 Installing PKS
- Part 5 Granting PKS Access
- Part 6 Cluster Operations
- Part 7 Cluster Access
- Part 8 Harbor Registry
I am not going to cover the OVA deployment as that only needs basic configuration such as host name, IP addresses etc.
Ops Manager Authentication
Once Ops Manager has finished deploying and powered up the web interface should be available (via a HTTPS connection). You cannot do anything until authentication is setup comes so I need to select one of 3 authentication mechanisms to get into the product.
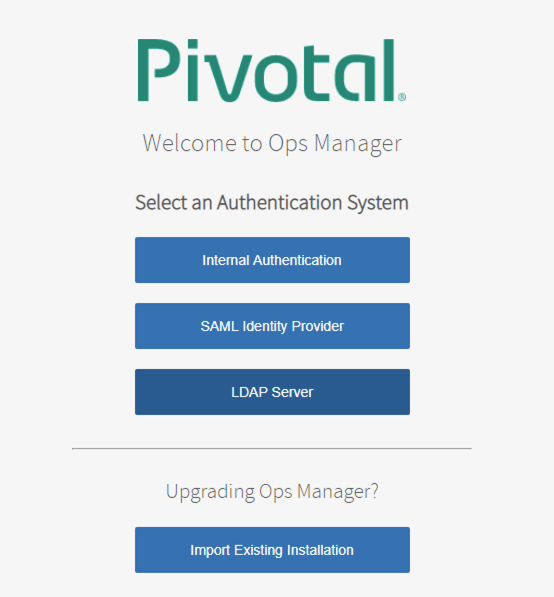
I’m going to use my Active Directory as a basic LDAP source so I am selecting “LDAP Server” as my option. As with any other configuration I need to provide a lookup account, user base and group base as well as attributes to use when doing LDAP searches to match against.
Some of my configuration requires validation (i.e. I don’t know whether it is going to work) and there is no way to test whether the configuration will work within the GUI. The easiest way to approach this is to snapshot the Ops Manager VM so that if you make any mistakes it can simply be reverted. Additionally Pivotal provides a method of validating your search parameters on the command line before you actually commit them in the GUI.

To get onto the command line of Ops Manager you need establish and SSH session, logging in as user “ubuntu” and providing your private ssh key for authentication (the public part of this will have been provided during the Ops Manager OVA deployment).

To test LDAP I need to install the “ldap-utils” package using “sudo apt-get install ldap-utils”. When I tried to do this the first time apt-get could not locate the package however after performing a “sudo apt-get update” the ldap package installed fine.
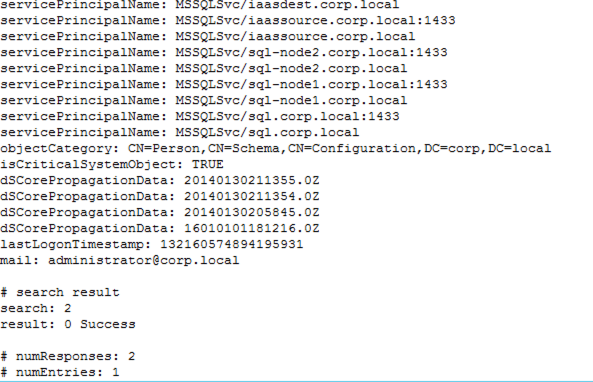
Here I am using the “Administrator” account to bind to the directory (make sure you use a proper service account!), searching in “cn=users,dc=corp,dc=local” for a user that has a common name of “Administrator”. This is the equivalent of using a cn={0} filter where {0} is automatically substituted for a name to search for by Ops Manager.

My search has produced a single result as expected as my directory is very small with few users.
However, in a production environment with hundreds or thousands of users “cn={0}” would likely produce multiple results and would therefore not work. For this reason (with a Windows directory) it would be better to use “sAMAccountName={0}” which would guarantee a unique return result.
For the group filter I can adopt the same approach. Here I am searching for all the groups that the supplied user is a member of.

My user shows as being a member of 7 groups.

Now I have validated that my LDAP configuration will work if committed it can be saved. This will move the interface onto the login window. Although the first field has “Email” shown in it you should enter whatever attribute you configured to use in your authentication setup. My LDAP settings were defined to use a common name (“cn”) so I can enter “Administrator” rather than an email address.

BOSH
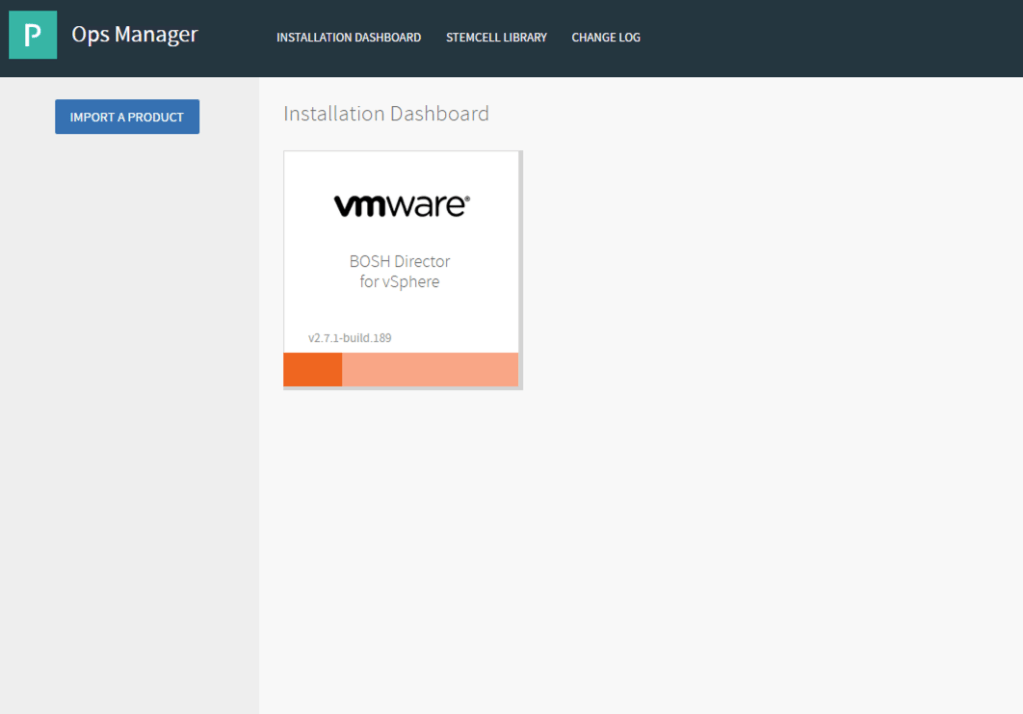
Once I have logged in to Ops Manager with a member of the RBAC group (in my case an AD group called “pks-admin”) the BOSH configuration for vSphere will be shown as a “tile”. The tile is shown in orange which means the configuration has not been completed and not applied. This is expected as I haven’t provided any of the necessary information as of yet.
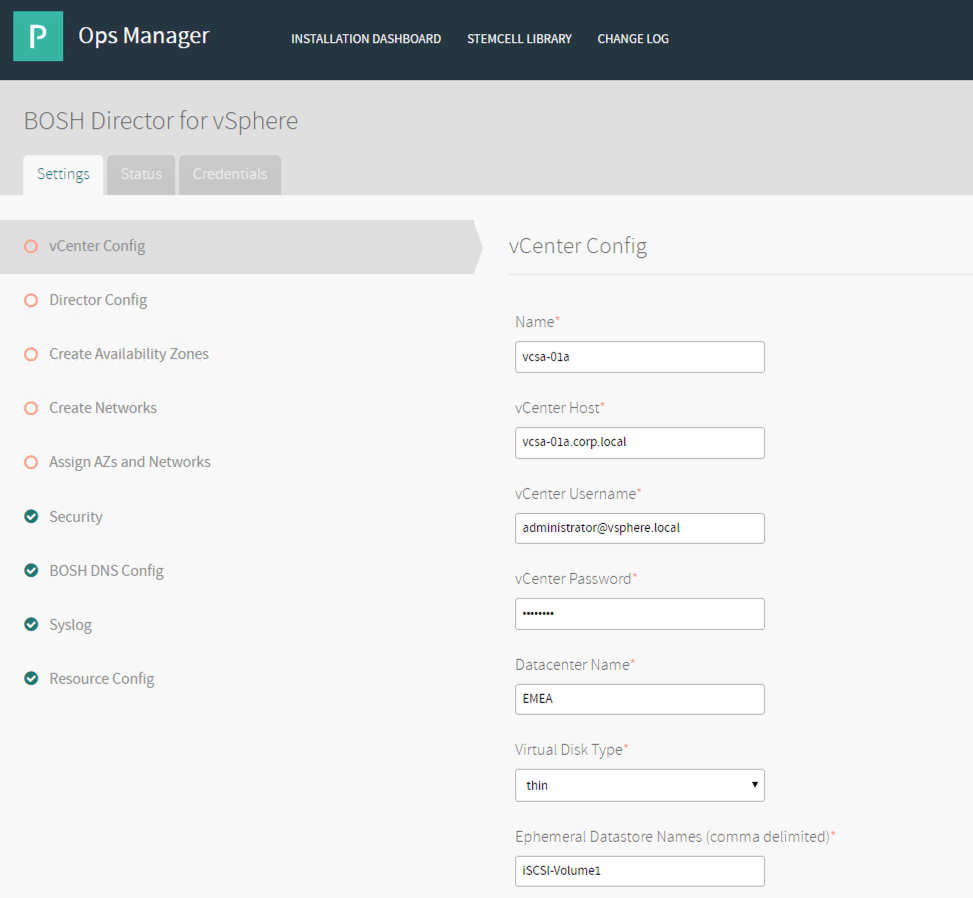
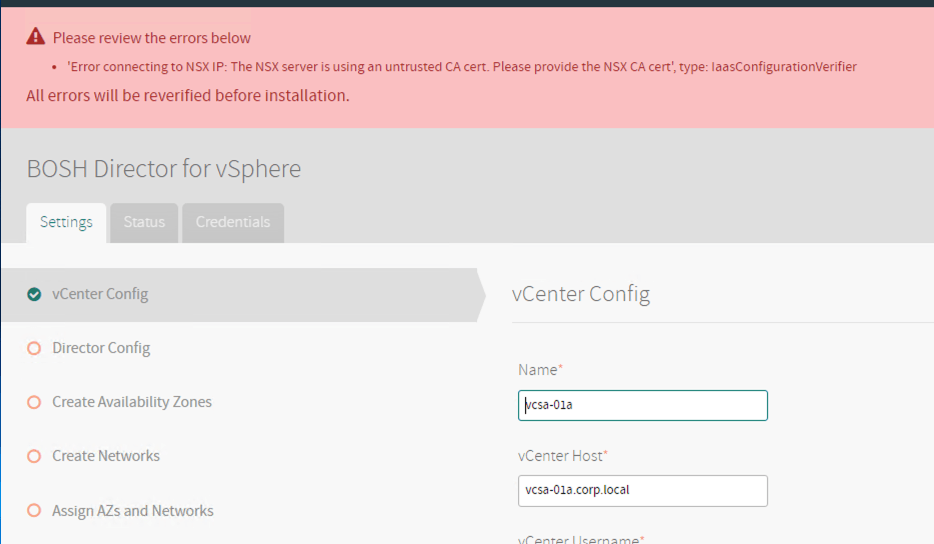
I need to step through the list of items before the configuration can be saved and applied. The vCenter details need to match the configuration within the specified vCenter (i.e. enter a datacenter name that actually exists).
Part of this configuration enables you to provide NSX-V/T manager connection details including a username and password. When I first tried this I saved the screen to move to the next stage however an error resulted as shown below. This appears to be a known issue where the self-signed cert that NSX Manager uses is not secure enough because the issuing authority is not trusted.
I took this opportunity to fix this issue by replacing my NSX-T manager cert with one signed by MS CA.
- Generate a CSR from the NSX-T GUI
- Downloading CSR
- Submit CSR to CA
- Download cert file and root cert file (plus any intermediate cert files)
- Combine contents of above files to a single file (issued cert first, then any intermediate CA certs and then root CA cert)
- Import certificate for CSR in the NSX GUI as the CSR response
- Apply the cert to NSX manager via REST API
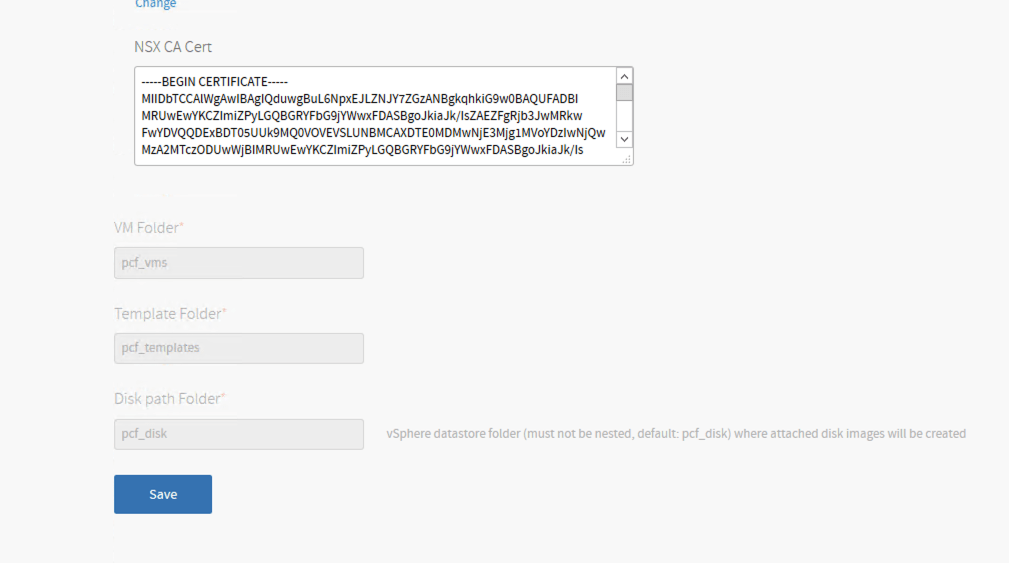
Once I had done this I placed my root CA cert into the “NSX CA Cert” box provided in the BOSH tile as shown below.
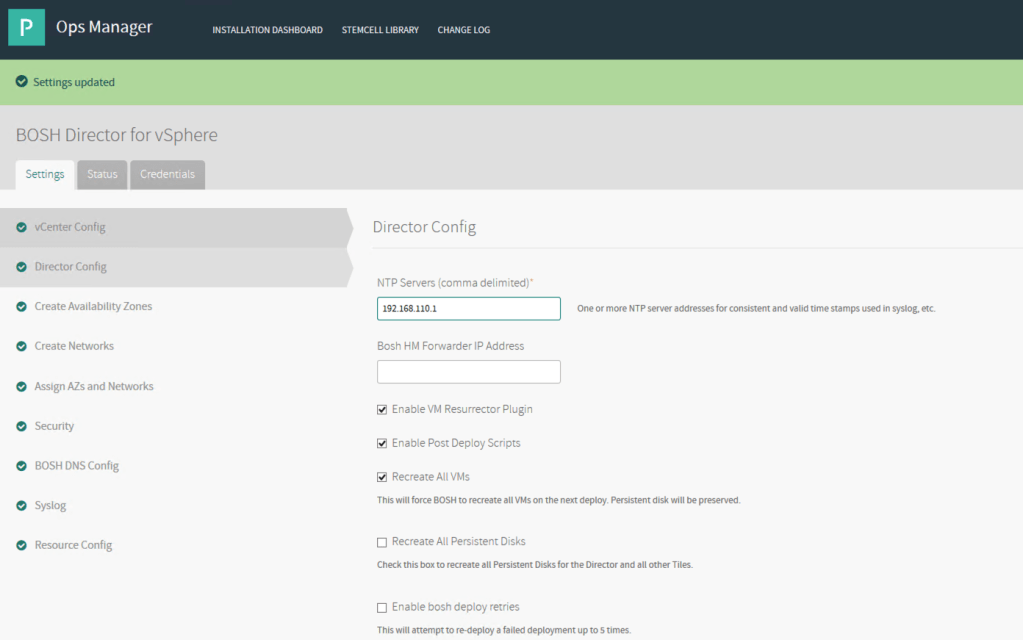
The director config contains all the settings that BOSH uses to handle deployments. Here I have provided an NTP server as well as enabling:
- VM Resurrector Plugin – enables BOSH to perform health monitoring and auto-healing
- Post Deploy Scripts – required for PKS to deploy successfully
- Recreate All VMs – forces BOSH to recreate all VMs on the next deploy
I have left everything else as default as recommended by Pivotal and VMware.
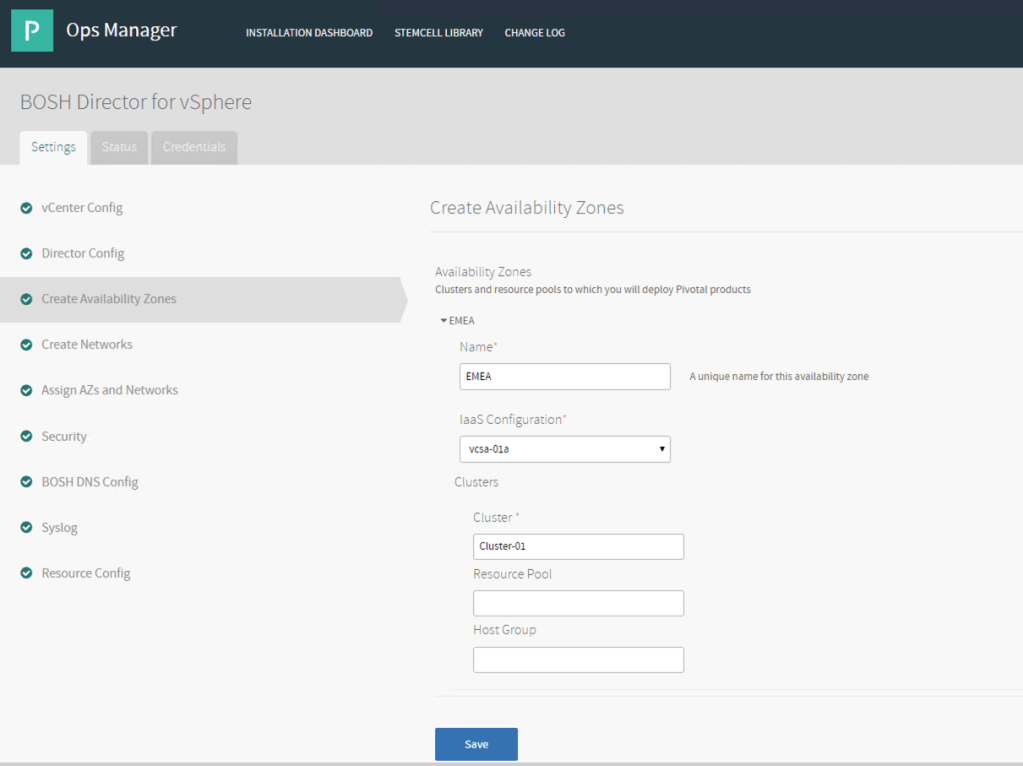
Availability Zones represent logical designations of infrastructure that services/applications run in which could fail if something within the zone were to experience a technical issue. Having multiple Availability Zones allows administrators to minimise the risk of application failure by distributed application instances over several zones.
With Ops Manager each Availability Zone is defined as a collection of one or more vSphere clusters. For example, 2 clusters that reside in the same physical rack might be regarded as within the same Availability Zone if they are serviced by the same power, switches and storage. In my environment I only have a single cluster so I only have one Availability Zone.
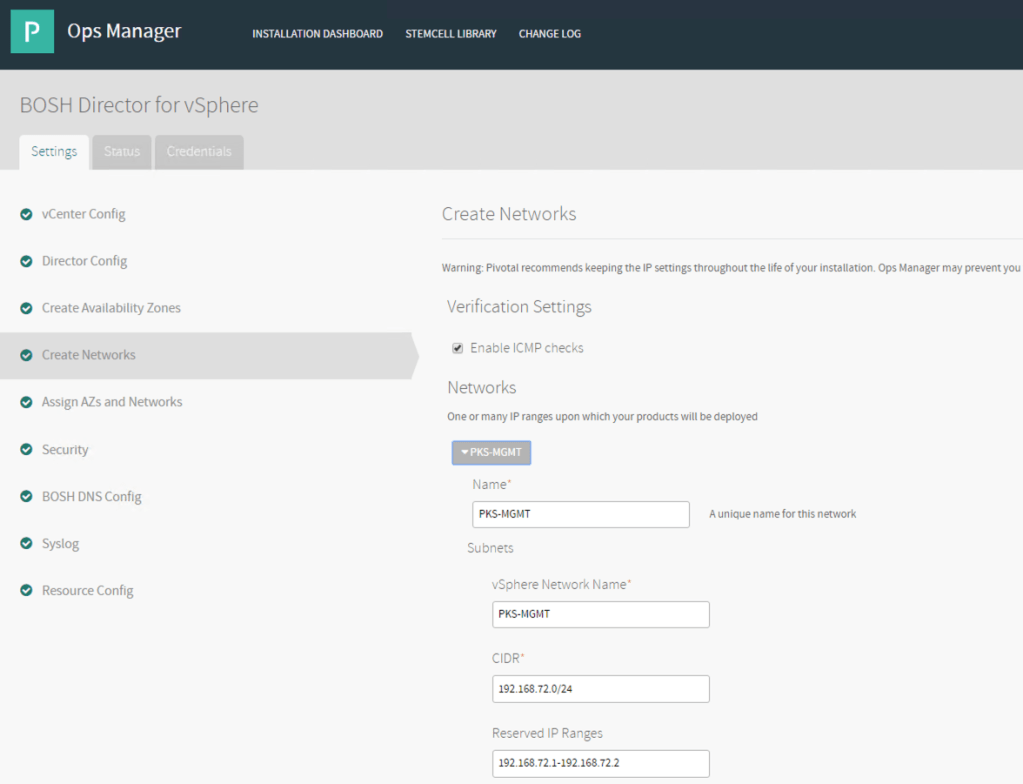
The Networks you define in BOSH Director are the ones you want BOSH to use when deploying VMs (in this case PKS). In my install I am adding the “PKS-MGMT” NSX-T logical switch which Ops Manager is sitting on along with the network address and any IPs from the network that BOSH cannot use (i.e. the default gateway and the Ops Manager IP address in my case).
BOSH Director is a single VM and therefore I need to designate which Availability Zone and which network within the zone to use to house it.

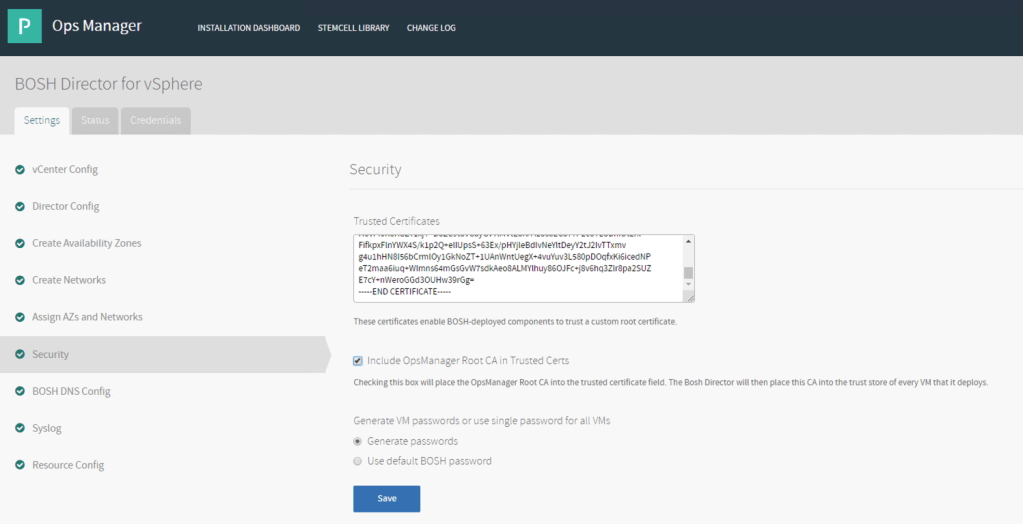
As I have a MS CA in my environment for issuing certificates I have added this to BOSH so that any VMs that BOSH deploys will automatically trust certificates issued from this CA. I have also set BOSH to generate and store unique passwords for everything that requires a password.
Finally the size of the BOSH Director VM can be set. There are a number of T-Shirt sizes that can be selected from however PKS requires a Director that has at least 8GB of RAM. I’ve opted to keep the assigned resources low as my environment is not very large.

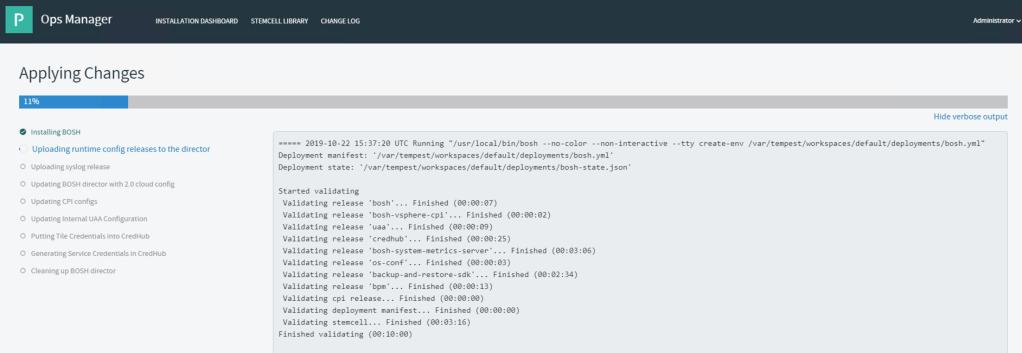
Once the configuration has been saved it is applied by returning to the “Installation Dashboard”, reviewing the pending changes and applying them.


At this point I have a functioning Ops Manager and my BOSH Director is now deployed. In my next article I will be looking at prepping NSX-T for deploying PKS.

Pingback: PKS – Getting Started Part 1 Overview | vnuggets
Pingback: PKS – Getting Started Part 3 NSX-T Prep | vnuggets
Pingback: PKS – Getting Started Part 4 Installing PKS | vnuggets
Pingback: PKS – Getting Started Part 5 Granting Access | vnuggets
Pingback: PKS – Getting Started Part 6 Cluster Operations | vnuggets
Pingback: PKS Getting Started Part 7 Cluster Access | vnuggets
Pingback: PKS – Getting Started Part 8 Harbor Registry | vnuggets