Overview
In this article I am going to be covering the installation of the PKS tile within Pivotal Ops Manager and deploying the PKS control plane VM. Please check out some of the other articles in this series if you haven’t already done so.
- Part 1 Overview
- Part 2 Ops Manager and Bosh
- Part 3 NSX-T Prep
- Part 4 Installing PKS
- Part 5 Granting PKS Access
- Part 6 Cluster Operations
- Part 7 Cluster Access
- Part 8 Harbor Registry
Installing The PKS Tile
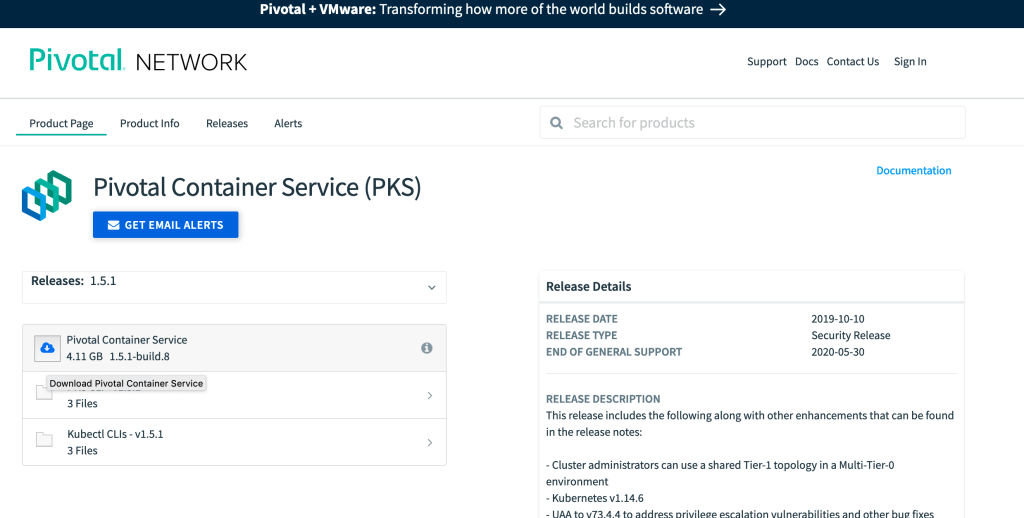
Pivotal Ops Manager is responsible for deploying and configuring the rest of the Pivotal apps that make up the PKS solution. In order for me to deploy the PKS control plane VM I first need to download the PKS file from the Pivotal Network on pivotal.io.
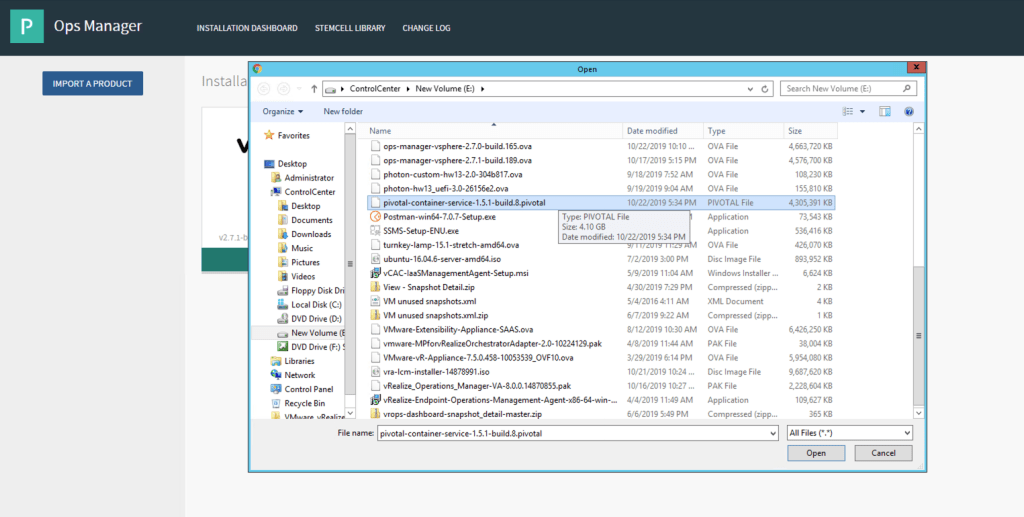
The “Import A Product” option can then be used to load the tile into Ops Manager.
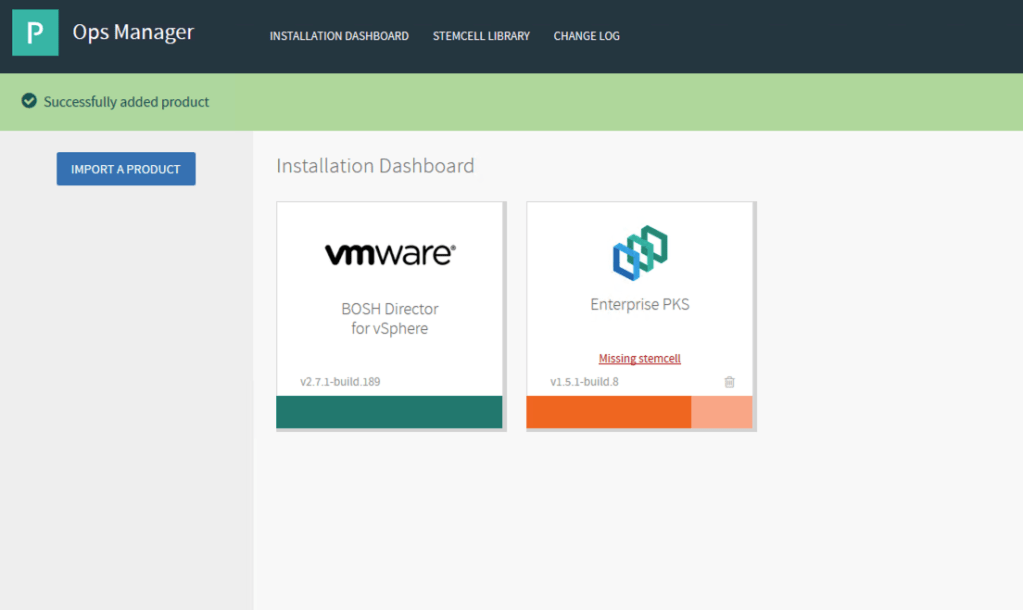
Once the tile is imported it is shown in orange as it is not configured. In addition the tile shows it has a “Missing Stemcell”. A stemcell is a packaged operating system which contains the file system for machines managed by BOSH Director. In other words the tile will deploy the PKS application but I need to provide the operating system for the PKS control VM.
Clicking the stemcell link on the PKS tile takes me to the “Stemcell Library” where I can see which stemcell version is required (and also import it once have downloaded it from pivotal.io).
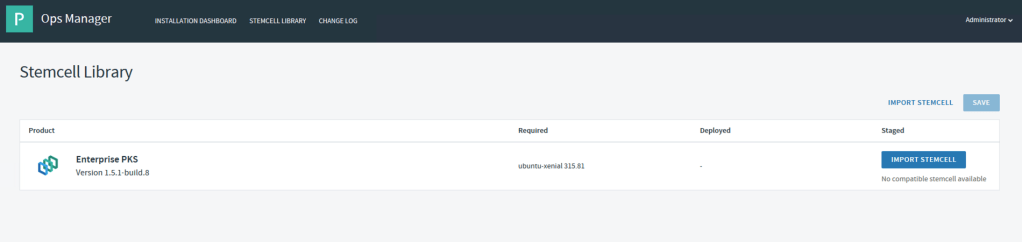
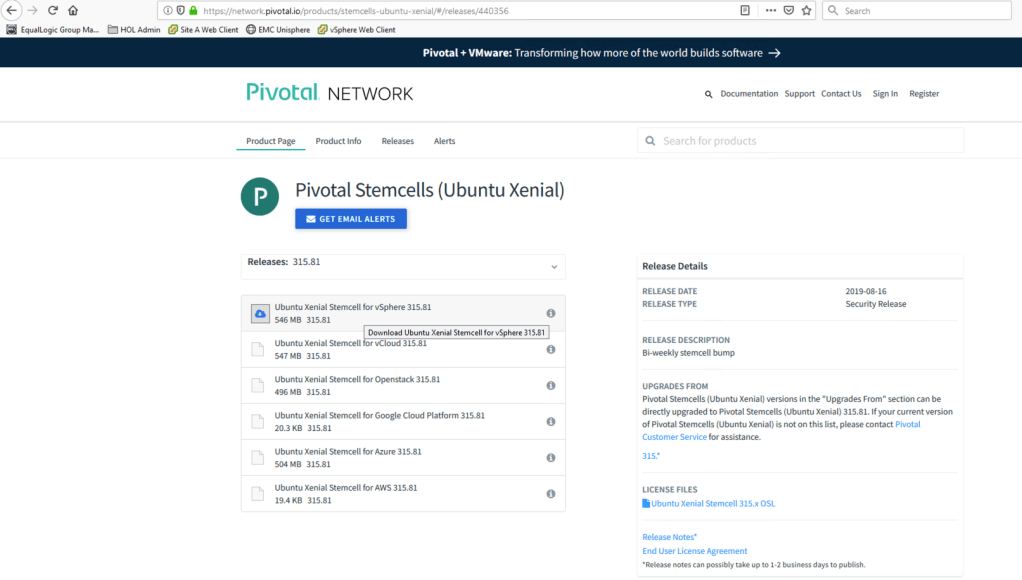
PKS requires the “Ubuntu Xenial” stemcell of which there are multiple releases on the pivotal.io website (Pivotal Network). Unhelpfully they are not listed in version order so you just have to search through the list 😦
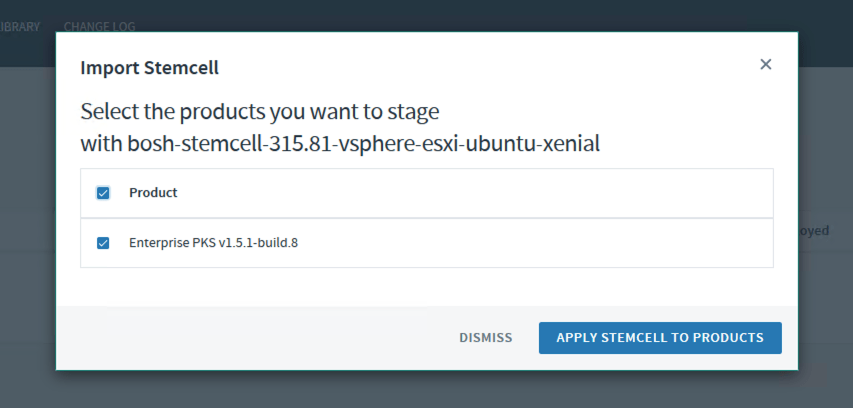
Once I have the stemcell file it can be imported using the “import” button and applied to the PKS product.
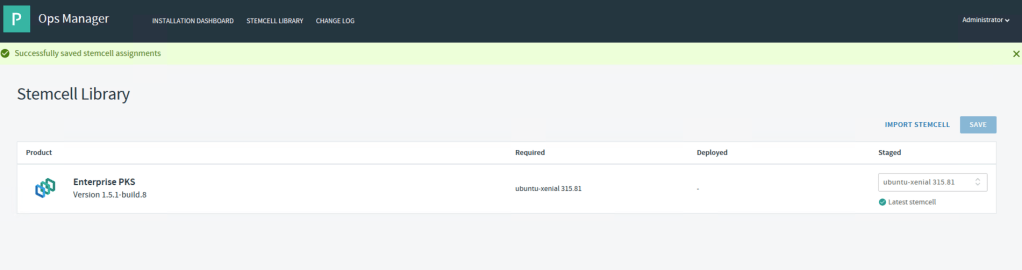
The PKS product will show the stemcell as “staged” in the stemcell library view once the stemcell has been applied.
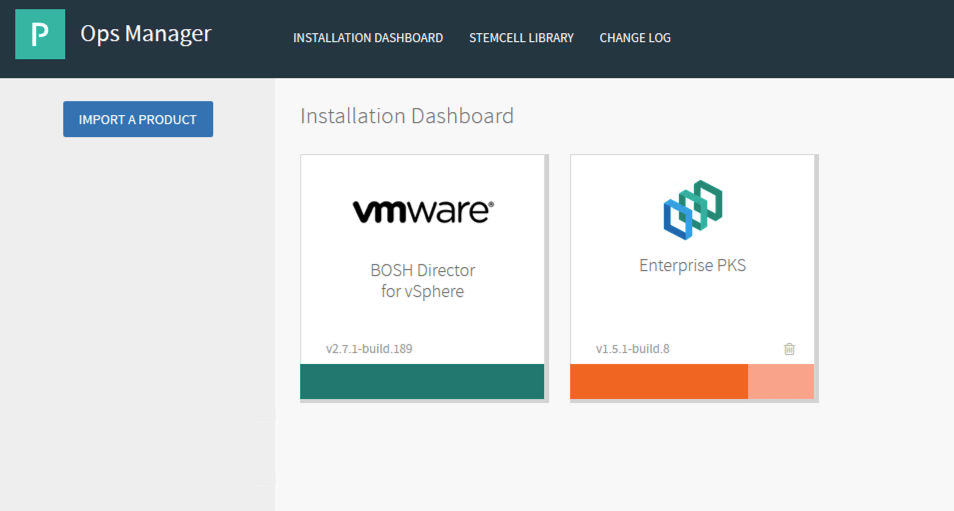
Going back to the main “Installation Dashboard” now shows the PKS tile without the “Missing Stemcell” link which means I can go ahead and start adding the configuration to the tile.
Configuring The PKS Tile
This next part has a lot of screen shots so be warned!
The first part of the configuration decides where the PKS control VM will be placed and which networks it will use. The “singleton” setting will be the Availability Zone that will house the PKS control VM (note I only created one when deploying BOSH Director so there is only one for me to select). The “Balance” setting needs to be configured but as per PKS 1.5 documentation, this setting is not used.
The “Network” option defines which network the PKS control VM will be connected to, also taken from the setting we used to configure BOSH Director. The “Service Network” option can be set to the same network which will allow PKS to create a new Kubernetes service network as required per Kubernetes cluster.

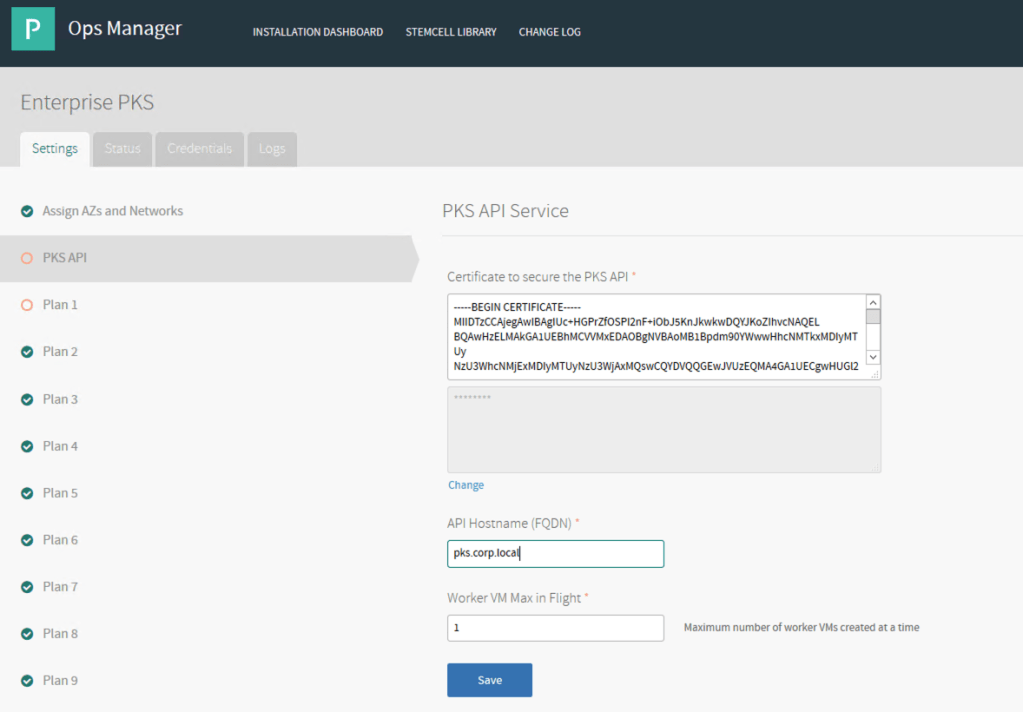
The PKS API is a component of the PKS control VM and uses a certificate to encrypt its communications. I can either go back to my MS CA and generate a certificate key pair or I can generate a self-signed certificate right here. Just this once I’m taking the easy option and using self-signed (I might come back and re-do this later though).
The API connection needs to have it’s own hostname as well. If you’re creating your own certificate for the API then make sure the hostname is included!
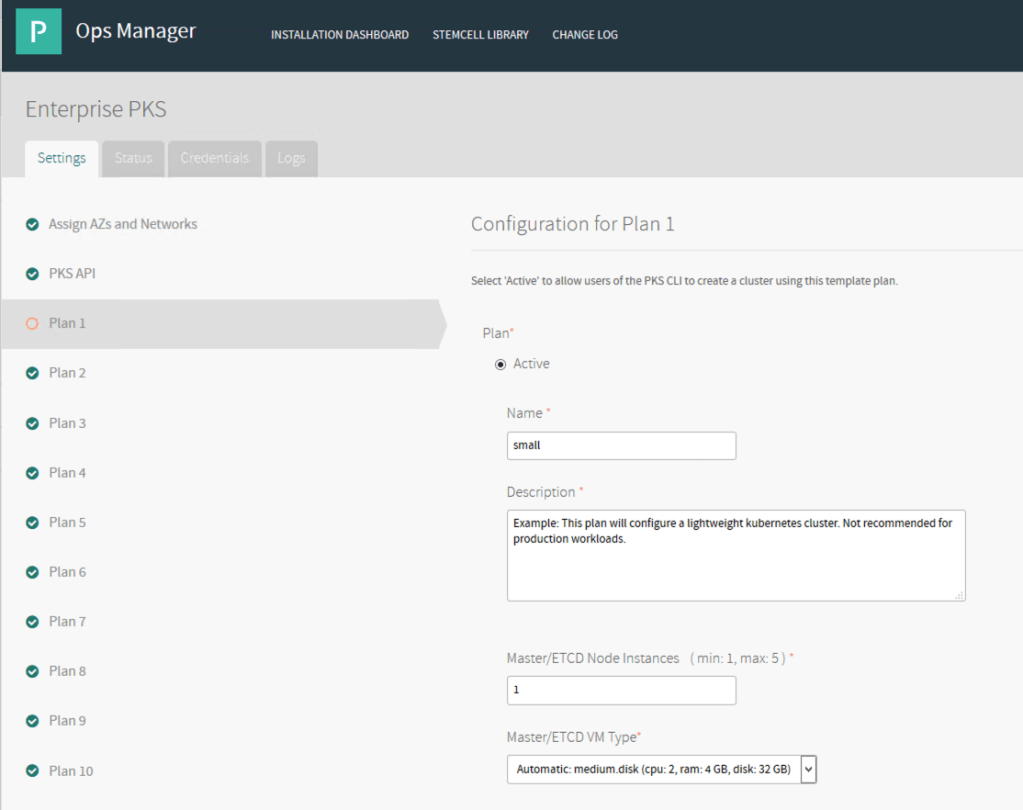
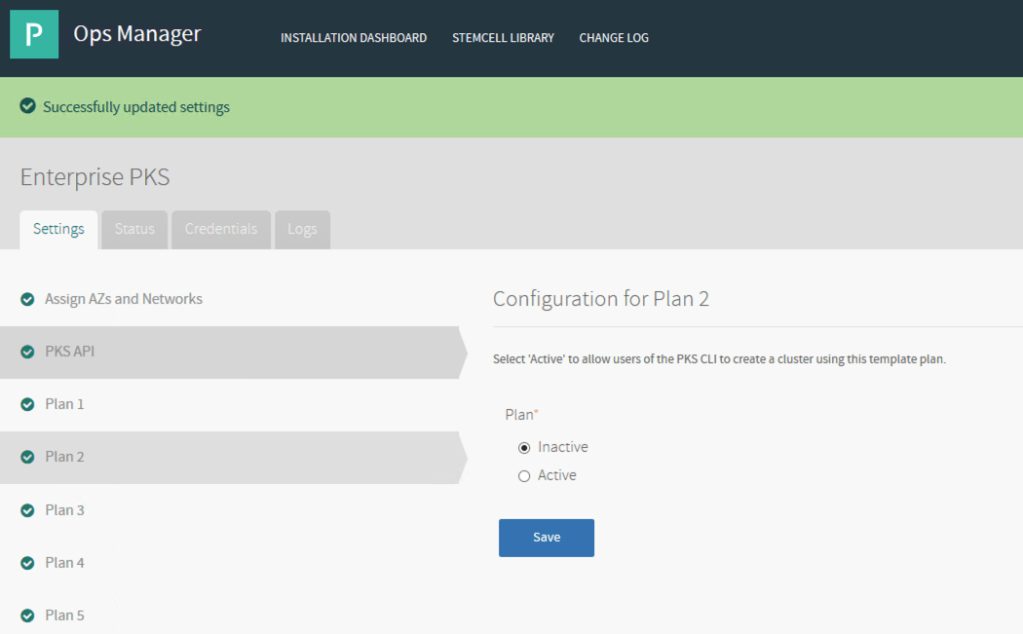
Now I can move onto the various plans within the tile. These are the options that a PKS user will be able to select from when requesting a new Kubernetes cluster. The minimum configuration needed is for “Plan 1” (with the smallest settings) with all other plans being inactive unless required. Each plan defines the Kubernetes node sizes, number of worker nodes per cluster (minimum and maximum), persistent disk size, Availability Zones to use in order to maximize cluster availability and how drain operations (removing all pods) on each node should be conducted for the plan being edited.
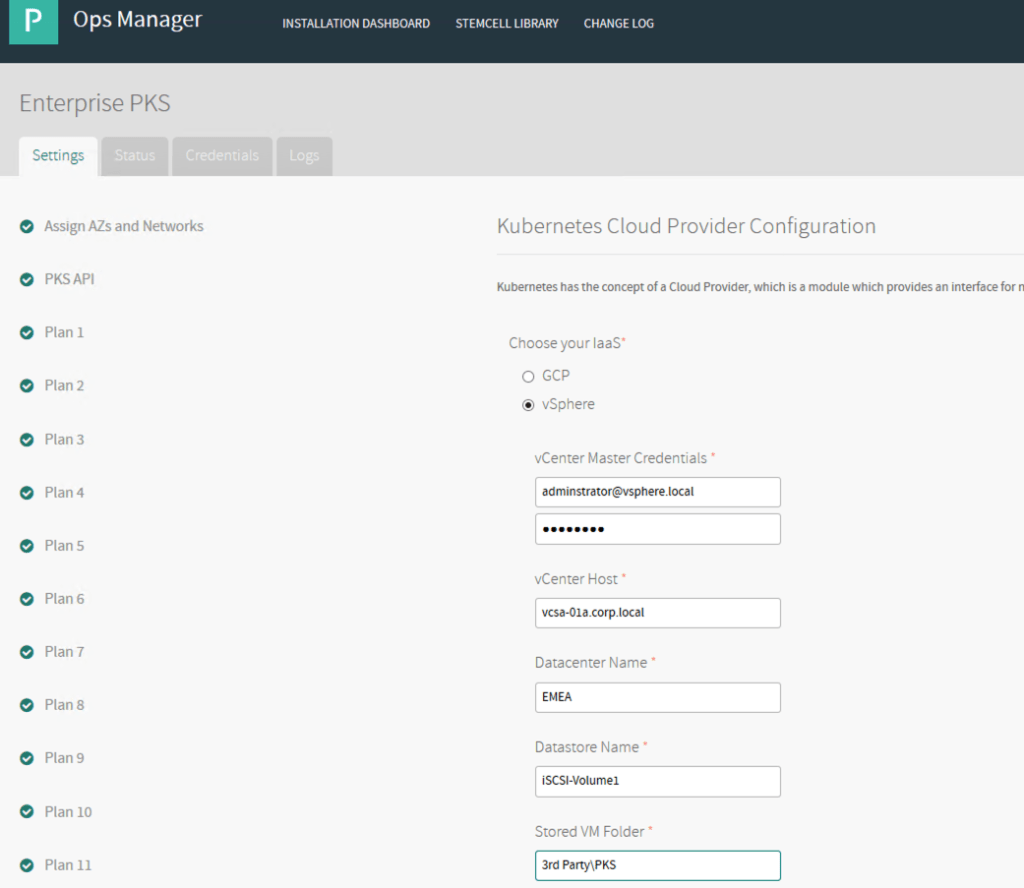
The Cloud Provider Configuration holds the configuration that the PKS control VM will use to connect to the infrastructure provider (i.e. vCenter) as well as the name of a single datastore from the “Persistent Datastore Names” list in the BOSH configuration.
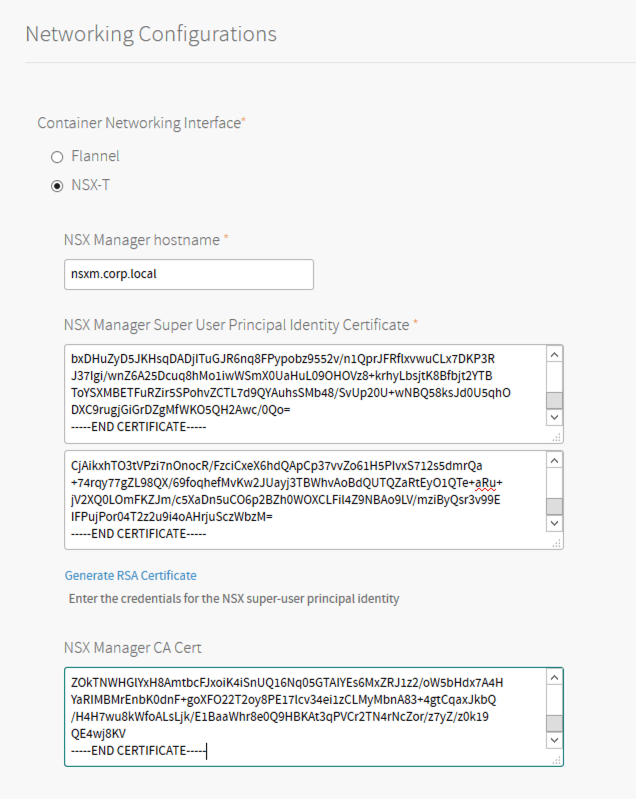
I’m skipping the logging section (my Log Insight server is down to make space for this lab) and moving straight onto the “Networking” section. This is where I need to define what CNI (container network interface) PKS is going to use. As this environment is NSX-T integrated the option I have selected is “NSX-T” as well as providing my NSX manager FQDN (note this would be the manager cluster FQDN if I had a cluster of managers).

Next I need to go back to NSX-T and do some retrospective changes. The PKS control VM does not use username/password authentication to NSX-T. Instead it uses certificate authentication so to make things work I need to bind a certificate to an NSX-T principle user and then provide that certificate and private key to PKS.
My NSX-T has no vIDM connection so I’m going to create a new local user and use the public part of a certificate I have generated in MS CA for this user.
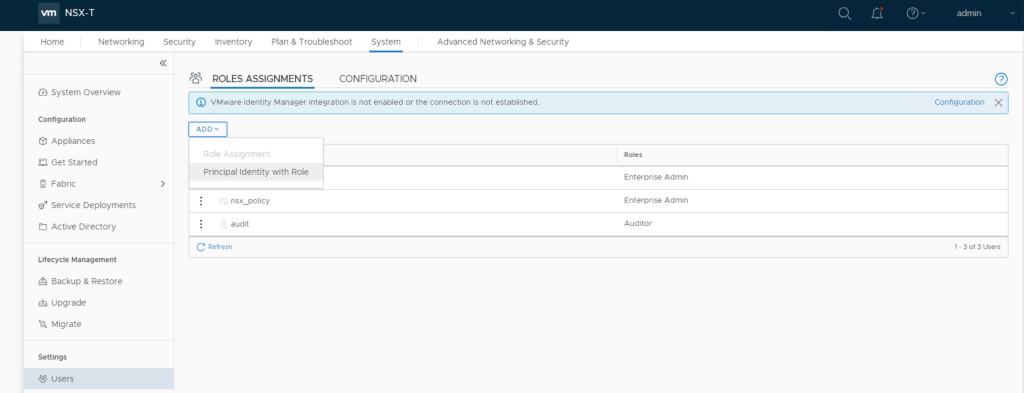
I’m giving this principal user the “Enterprise Admin” role.

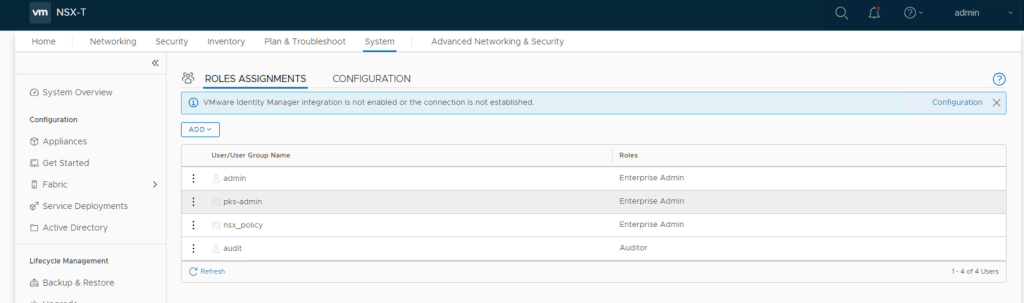
My new user is now listed.
The public and private keys for the user can now be added in the boxes provided. I’ve also added the MS CA certificate that issued my NSX managers certificate.
As this is a test environment and I fully expect there to be some sort of certificate issue I have disabled SSL verification. I will come back and disable this setting once I have everything tested. NAT mode should also be disabled given that I am going for a fully routable setup according to my own design (see part 1 of this series).
All the UUID’s for the various IP blocks, pools and routers can then be added too the boxes provided. The services network range should be auto-populated (one of the reserved ranges I was referring to in a previous article) so this can be left as it is.

The recommendation for PKS UAA (from the PKS documentation) is to leave the timeout values as per defaults so I’m not going to modify these. I do however want to use UAA for authentication into any Kubernetes clusters that are deployed so I have enabled UAA as the OIDC provider.

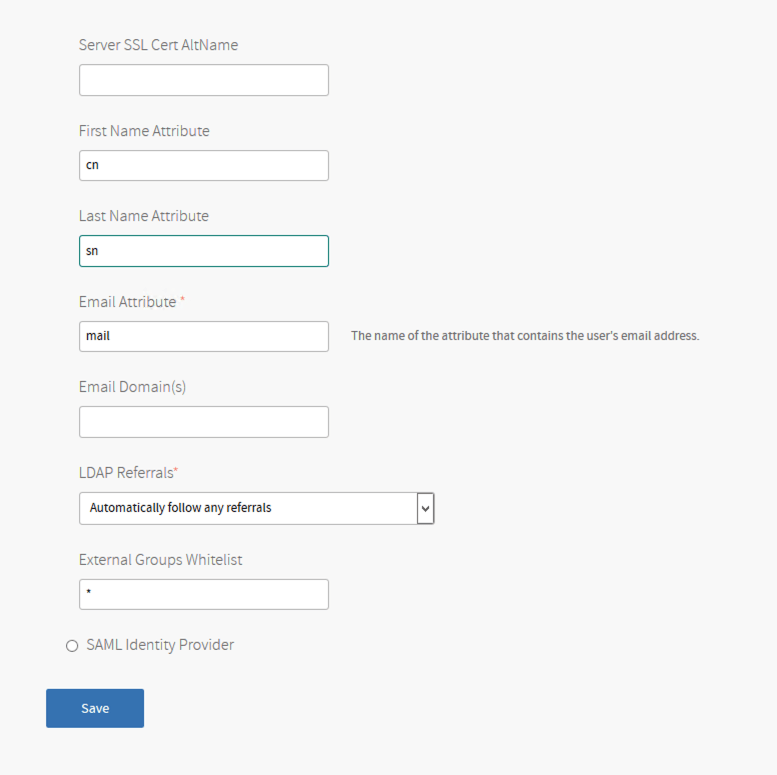
I want UAA to use the same user configuration as Ops Manager (i.e. LDAP directory source) so I am replicating those settings here. I’m happy using a user search filter as “cn={0}” as my directory has very few users. For production AD directories you should be using “sAMAccountName={0}”. Remember, these details are saved without being validated against the directory!

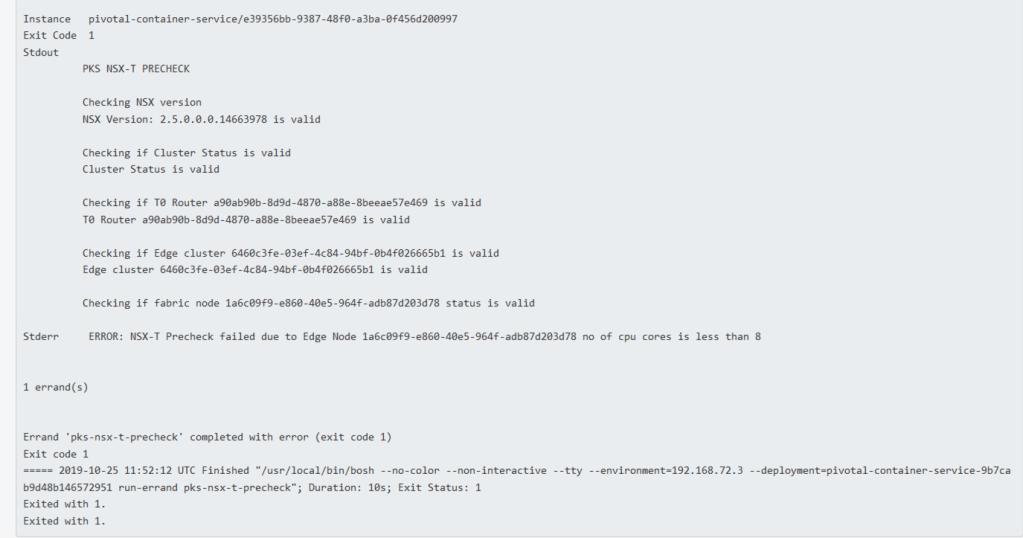
The “Errands” configuration tells PKS what to do POST deployment. In this case I want PKS to validate the NSX-T configuration and to run smoke tests. The “NSX-T Validation” errand MUST be run.

Once saved the configuration can now be applied.
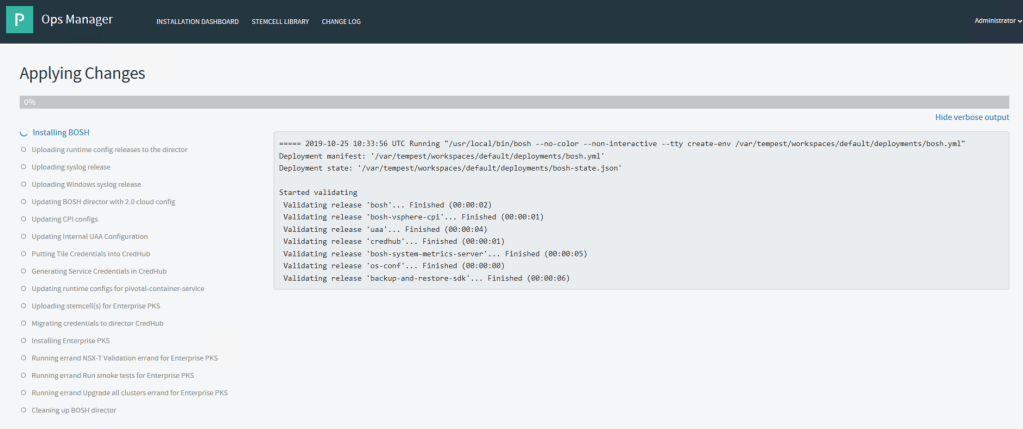
Here I got most of the way through but became a victim of not reading the documentation thoroughly enough! PKS requires the largest edge size possible (i.e. Large) and my environment was set up for “medium”.
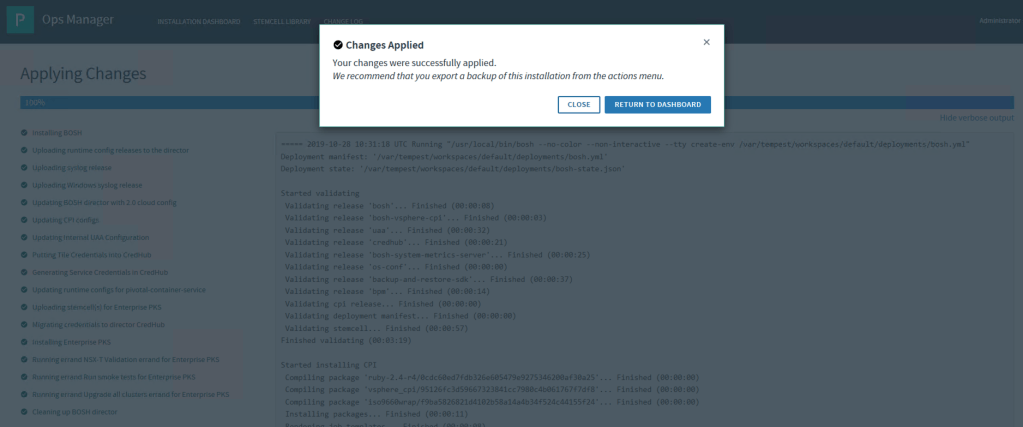
After swapping out my edge for the next size I can now re-apply the PKS configuration which completes successfully. Note that depending on the speed and capacity of your environment this may take some time to run.

This completes the PKS deployment stage. In the next article I am going to look at granting access to PKS and leveraging the PKS CLI to perform some activities including deploying Kubernetes clusters.

Pingback: PKS – Getting Started Part 3 NSX-T Prep | vnuggets
Pingback: PKS – Getting Started Part 2 Ops Manager and BOSH | vnuggets
Pingback: PKS – Getting Started Part 1 Overview | vnuggets
Pingback: PKS – Getting Started Part 5 Granting Access | vnuggets
Pingback: PKS – Getting Started Part 6 Cluster Operations | vnuggets
Pingback: PKS Getting Started Part 7 Cluster Access | vnuggets
Pingback: PKS – Getting Started Part 8 Harbor Registry | vnuggets